How to disable buttons in Glide apps
A simple hack using custom CSS and visibility features

Introduction
How many times did you come across forms that let you just submit once, well that should be the default behavior, is it not?
There are many ways in which this feature can be implemented. A few that pop out to me are:
Disable the button on submit
Redirect user to a different page once the form is submitted
Show a success message to the user informing that the submission is complete
Disable form fields
There are server side validations too that can be used. To name a few, by passing and verifying tokens, by validating on time interval between submissions, checking IP address and session ids.
In this post, I'll walk you through a simple yet cool hack using custom CSS and playing with visibility feature in a Glide app.
Oops, let me set the context in first place 😀. I've been writing quite a bit about various features of Glide, which is a powerful No Code tool primarily meant to build Internal tools within your organization, as well as an interface for your data.
It's not just that, there is a whole gamut of use cases that can be solved using Glide. Here are their customer stories which covers anything from a workforce management app to an applicant tracking system to a custom CRM tool.
Here's my first post on Glide, a simple one but one that'll help you get rolling 🎇
Let's disable 👓buttons 🕶
As always, there will be numerous ways to solve a problem. The method that I use is a combination of custom CSS and manipulating using the visibility features.
What's the charm without a working example, correct?
For learning purposes, I usually build an app based on a simple use case. In my past posts, I've been using Skill Sprout, a super simplified version of Udemy. This time, let me use the "Personal Assistant" app. The entities in this app are:
Customers
Personal Assistants
Preferred Sellers
Community
This is how it looks like:
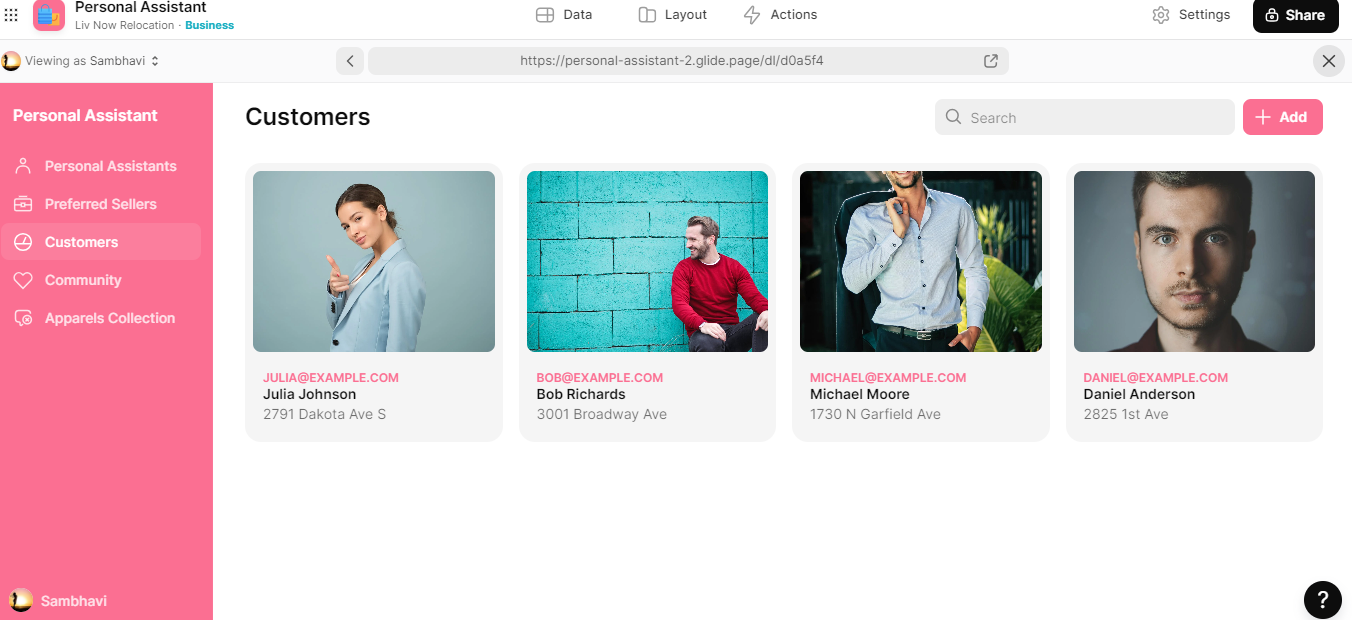
The idea is Customers will have Personal Assistants, who shop on behalf of Customers based on their preferred categories. Each category will have a list of Preferred Sellers. A community is nothing but an entity that is physically tied with a location and supports a couple of categories. Simple, huh 😉
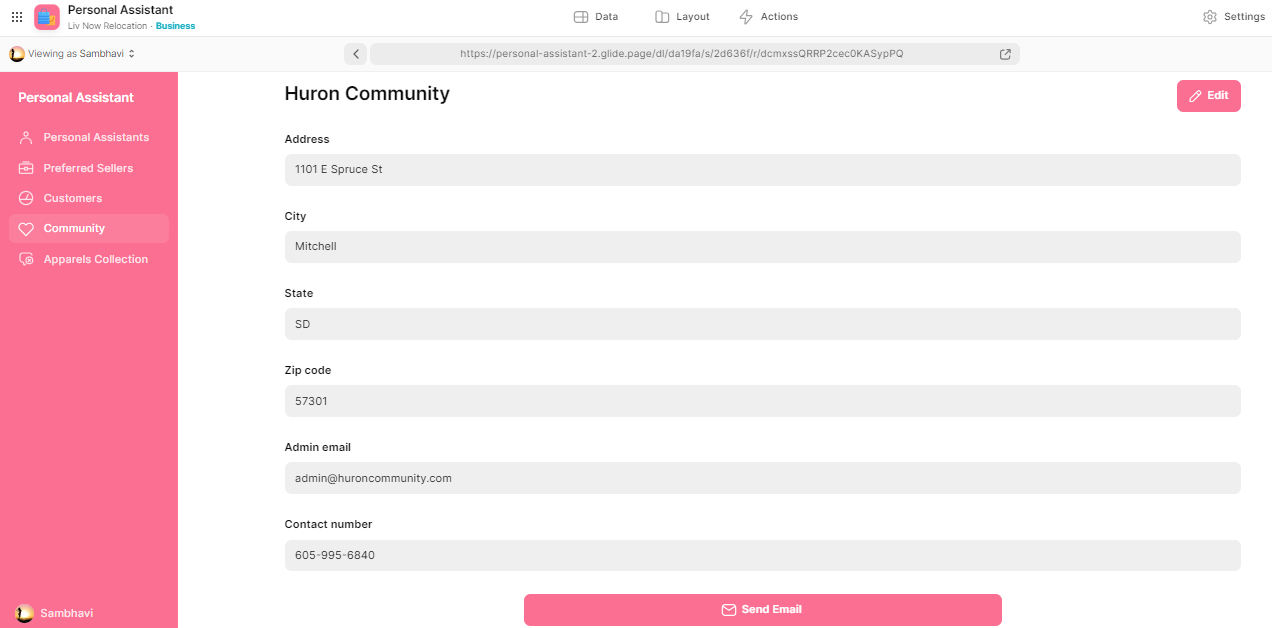
Let's now get into the actual task of disabling button. In order to showcase the same, I came up with a hypothetical scenario where clicking on the Community menu will show the list of communities, and clicking on a community will open up a form with the fields present in Community table. Below are the columns present in the Community table 👇
Name
Image
Address
City
State
Zip Code
Admin Email
Contact Number
Customer Relation - denotes the customers who are part of this community
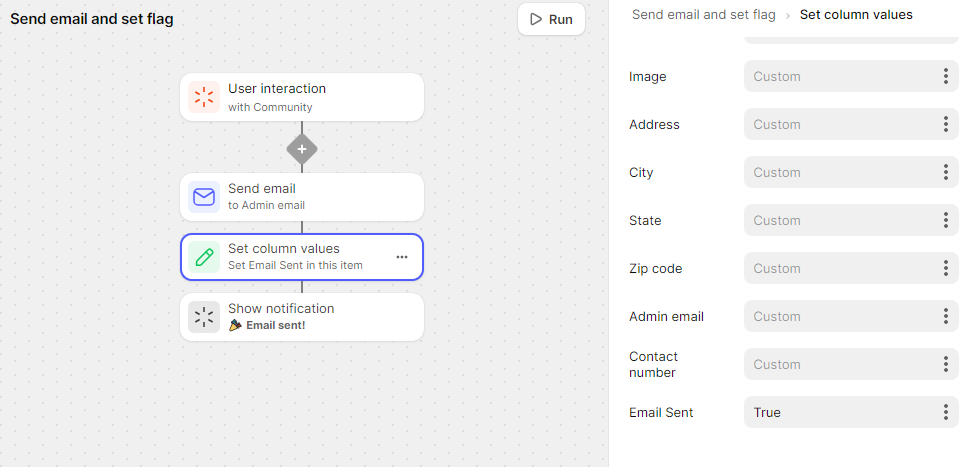
On form submit, an email should be sent. Once an email is sent, the button should be disabled so that the user does not send emails multiple times.
In order to implement this, I added a boolean column to the Community table. I named it "Email Sent?". Based on the value of this flag is how I control the visibility feature.
Clicking a particular community looks like this 👇
The action of Send Email button looks like 👇

I added another button and named it "Email sent already!". I added custom CSS to this button along with visibility condition. It looks like 👇
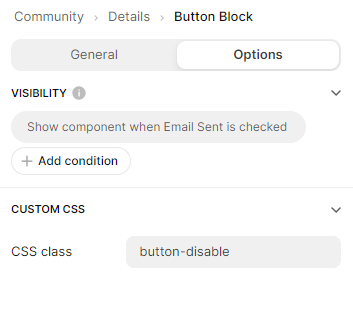
Make a note of the value True against the column Email Sent?
Quite straight forward, nothing fancy, is it not?
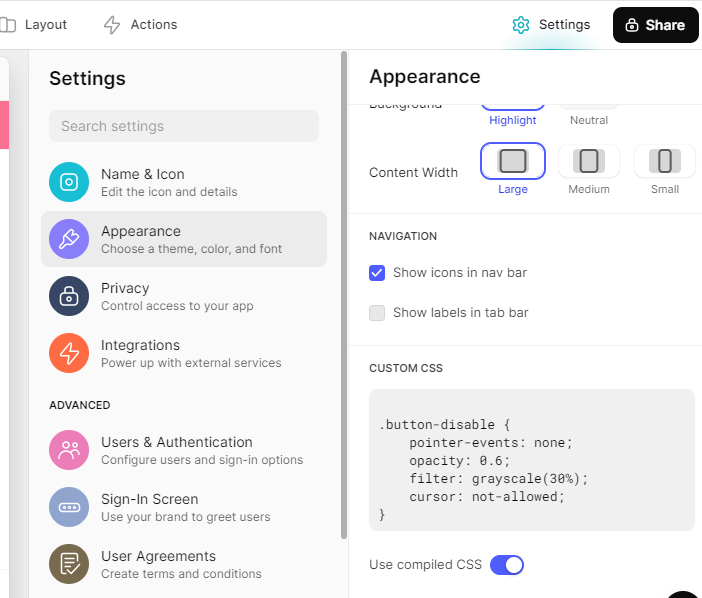
In order to add the actual CSS class definitions in Glide, you need to click on Settings -> Appearance -> Custom CSS. You also need to check the "Use Compiled CSS" option.
Check the properties I set for the class button-disable.
That's it! Now when a user submits a form, the button will looked grayed out and disabled.
Here's a short video where I show it in action 🙌
With custom CSS, a lot of styles can be achieved. Design can be custom made to a very good extent.
Conclusion
This is a super short post where we saw how to disable buttons in Glide using custom CSS and visibility features for buttons. It's a very handy approach and easy to implement.
Remember that the boolean column does the trick, but this logic will apply only in row based screens i.e. a form screen.
Instead of visibility condition, we can use the "Add condition" beside a button too. That's another way of handling it.
Hope you found this post useful. If you use any other approach to disable buttons, feel free to share.
Lastly, if you plan to build an app using Glide, or need any help with Glide, I'm just a DM away.
Ciao until next time 👋