Integrate Typeform with your Glide app
How to send out a Typeform & bring back the responses to your Glide app?

Introduction
In my previous post, we saw a couple of cool AI features available in Glide. I'm sure there are a variety of ways in which we can capitalize them and make our Glide app to be much smarter and user friendly. Implementing them is a breeze, just that one needs to be good enough to provide the right set of prompts as well as be creative in where to apply them.
In this post, let's take a spin on a different aspect, which is integration. Integration of multiple apps is a very common aspect of any No Code tool, same holds good with Glide. Glide provides native integration with a good bunch of tools in various categories. It also provides integration with Zapier which literally opens up a world of options.
In particular, I plan to take you through on integrating Typeform with a Glide app and bringing back the responses so that it can be displayed on the app's user interface.
Why forms?
I'm sure you fill in a lot of online forms, right from registration, feedback, survey and more. There are a lot of online form builders like Typeform, Jotform, Tally form that are so intuitive and interesting for the person who fills in, as well as makes lives easier for the person who creates the form. Gone are the days where form filling used to be boring and tedious ❌
I've used many forms in the past, each have their own set of pros and cons. I'm personally a big fan of Typeform, primarily for it's elegant design.
Hence thought of writing about two of my favorites, Typeform and Glide. Come on, let's roll 🎢
What are we building today?
Though it may sound cliche, I strongly believe in explaining something with an analogy or a working example so that it gets easier to relate with your own use case. After all, what's the use of learning something if we are unsure of applying it at the right place, is it not?
Let's build a minified version of Udemy like app in Glide. There will be just one instructor that published a course in our Glide app. Students can register to that course.
Once a student completes a course, the instructor would love to know about the student's experience of how they liked the course, what can be improved and so on. This is where Typeform kicks in.
The app will send an email that contains a personalized Typeform link when the Student clicks on a button "Mark as complete".
We will build a screen where the instructor will be able to view the responses provided by the students for that particular course.
Thus it covers the aspect of integrating Typeform with Glide as a two way road, add a response in a 3rd party tool and bring it back to Glide.
Sounds interesting?
Let's build our Glide app
I followed the steps explained below to bring up the Glide App
Once you sign in to your Glide account, click on New app on your dashboard
Select Glide Tables as your data source
I named my app as Skill Sprout 😎
By default, Glide comes with 2 tables Contacts and Companies and a couple of sample records in each
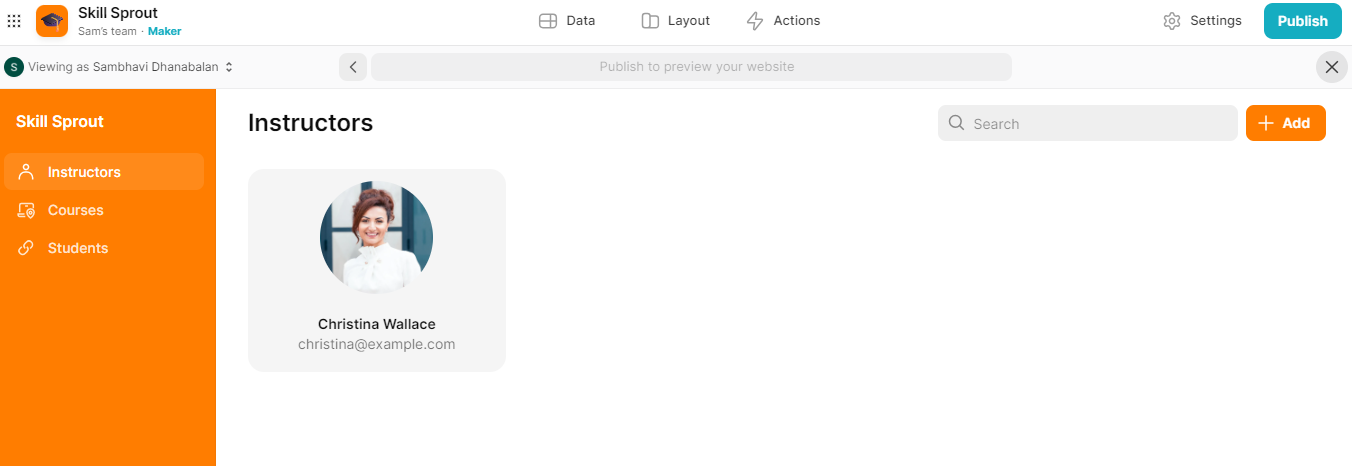
I simply renamed Contacts to Instructors and deleted all records except one as I intend to keep just 1 instructor 👩🏫
Likewise, I retained just one company and deleted the rest. I renamed the content in Name column as 'Marketing Guru'. It really doesn't matter as I don't intend to display the company information anywhere 🤠
I changed the Companies in Navigation pane to hidden as it's not required to be seen
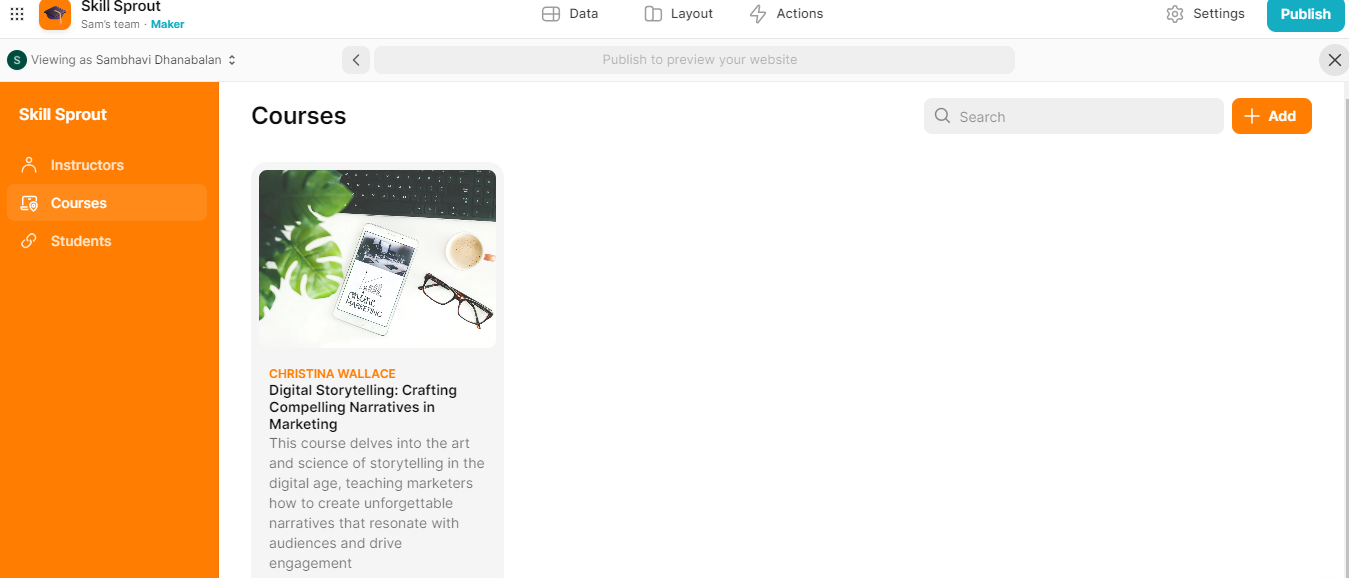
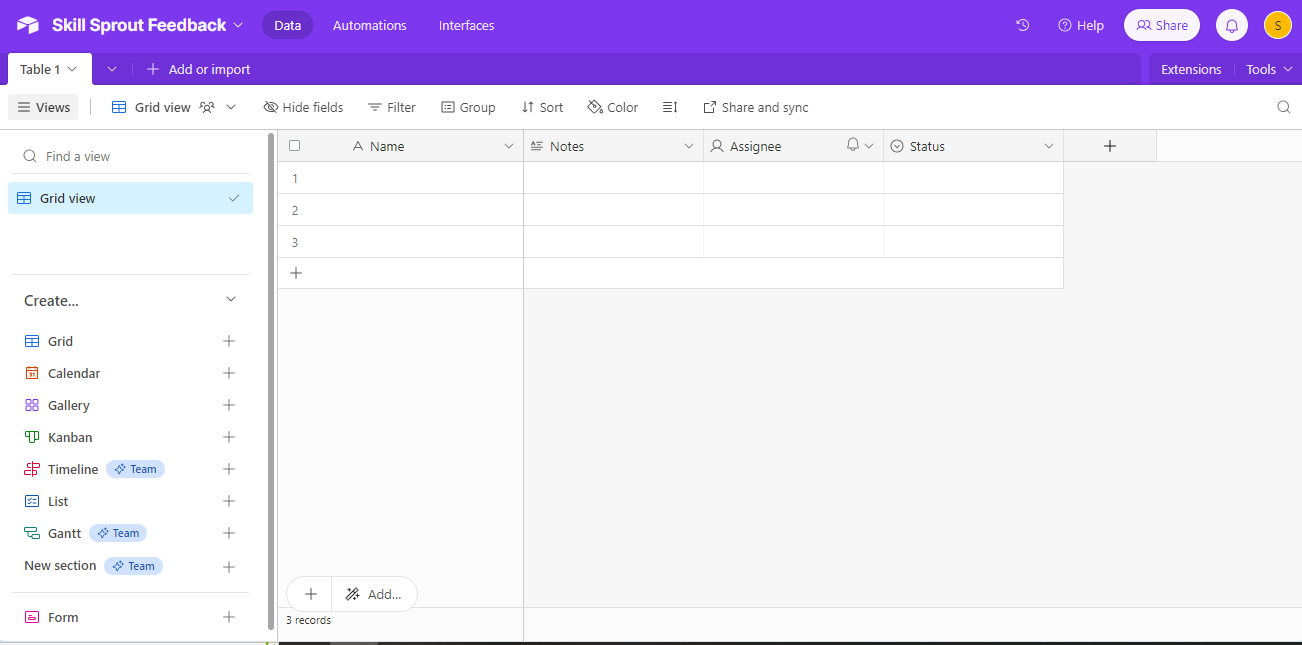
I then added a table to hold Courses, just keeping it simple with very few columns. Added a course too and associated with the instructor added in previous step
Next step is to add a table to hold the Students information. Again, keeping it simple with basic columns, added two student details as well. I associate them with the course created in the previous step.
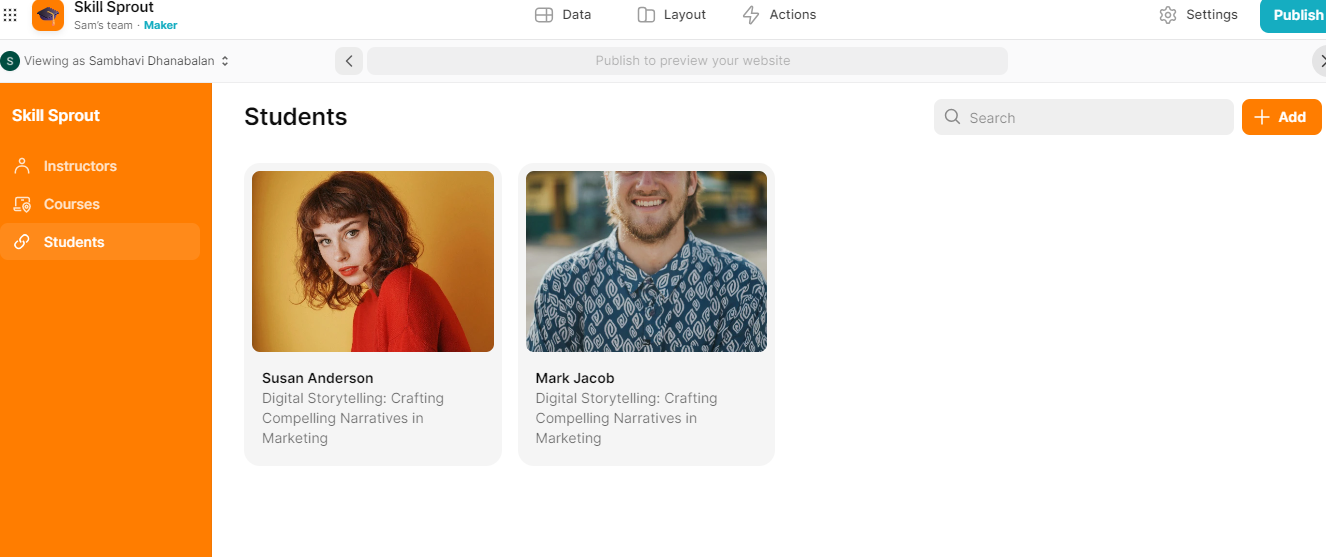
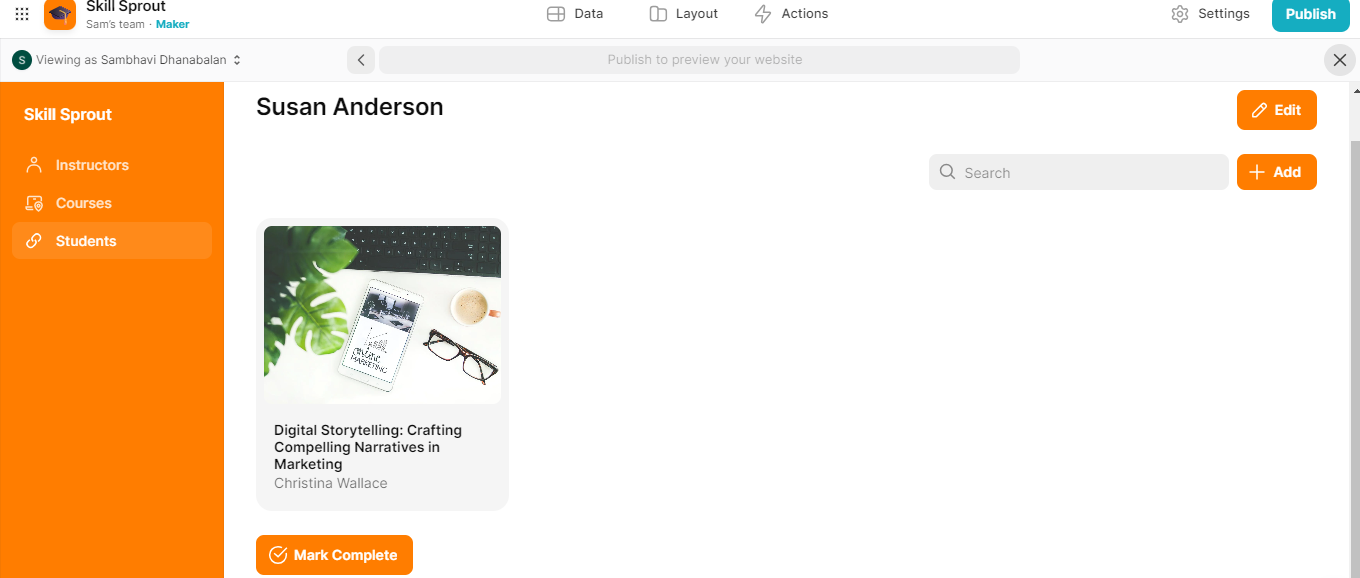
When you click on a student, it will show the courses that they've enrolled for. For now, it's just one course. There is a button Mark Complete below a course which when clicked will trigger a Glide action.
Let's put a pause on the Glide app front. We shall come back to defining Glide Action once we are done with the Typeform part.
Time to design a Typeform
Let's now move on to designing a simple feedback form in Typeform. Below lists the steps that'll be required:
Sign up with Typeform if you do not have an account. They have a free plan and we are good with it. No credit card is required when you Sign up
They ask for the usual on boarding questions, choose whatever applies to you
Create a new form from scratch
Let's now add a question for the student to answer

And one more question
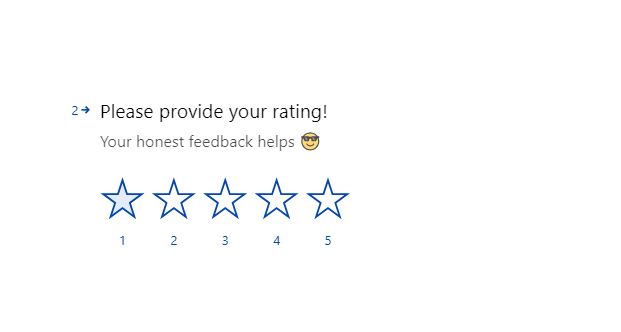
Let's just stop with 2 questions and add an end screen

Let's now put a pause to Typeform and work on the third component that will be used to tie up both Glide and Typeform!
Tie them together
There are multiple ways to tie them together and bring back the responses. One approach is to use Zapier and Glide tables API. Another approach is to integrate Typeform with Airtable and bring it back to Glide.
In this post, let's take the latter approach. In order to do that, we need to do 2 set of steps
To set up required table in Airtable
To integrate Typeform and Airtable using Typeform's native integration
Airtable is a blend of Spreadsheets and Databases. If you are not familiar with Airtable, I highly recommend watching their getting started videos.
Once you are comfortable, follow the below steps to be up and running in no time.
Sign up for free with Airtable if you do not have an account. Otherwise, just login to your account
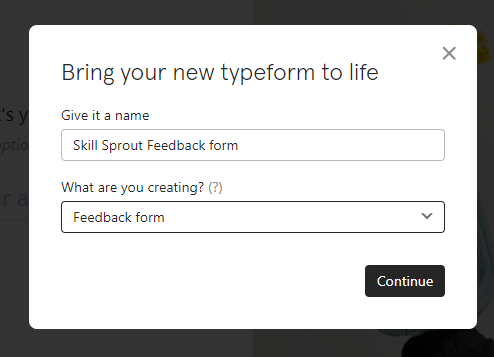
Once you are in the dashboard, create a new base. A base is equivalent to the traditional database that we are used to. I named my base as "Skill Sprout Feedback". Once created, we should see a table by default.
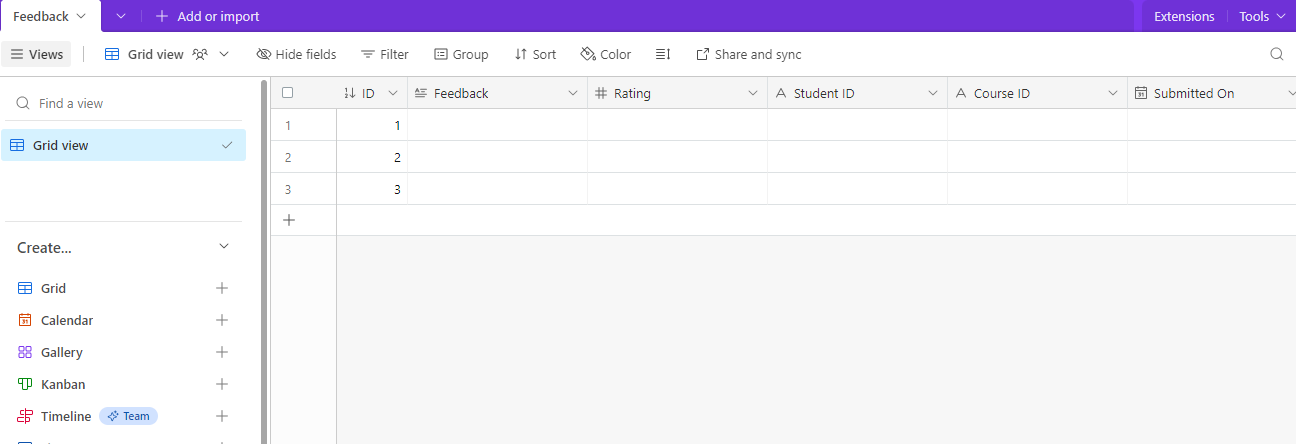
Let's rename the table and edit the columns to suit our need. Below is the table structure after making required modifications. Along with the feedback and rating information that the student provides, we also add placeholders for who gave the feedback and the course for which they gave. A date column that automatically saves the date when record is created is also added
That's it! We are done with the Airtable setup. Let's now go back to Typeform and add the integration with this newly created base and table
Go back to the form you created in the previous step and publish the form
On the right side pane of the form, you should see three menu items, Question, Design & Logic. Click on Logic -> Hidden fields. Add 2 hidden fields, one to hold the student who's submitting the form and the other corresponding to the course for which the feedback is being submitted. Let's name it as shown below 👇.
- 💡Make sure to publish your form without which the newly added hidden fields will not be visible in further steps

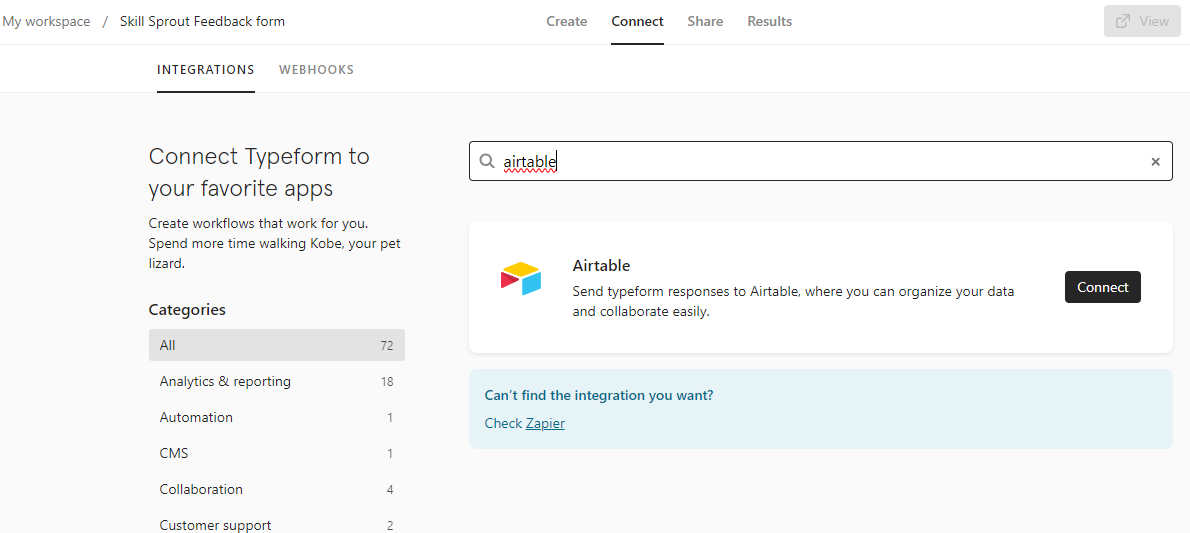
Click on Connect menu in Typeform on the top navbar, type Airtable and you should see Airtable listed below
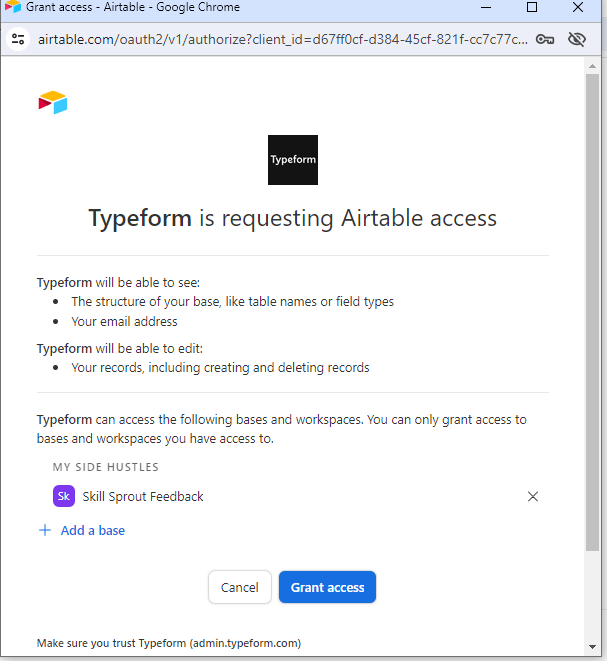
Click on Connect and provide the credentials to log in to your Airtable account. Once you log in, it will ask for a permission form where you can select the base that you want Typeform to access. In my case, I select the newly created Skill Sprout Feedback
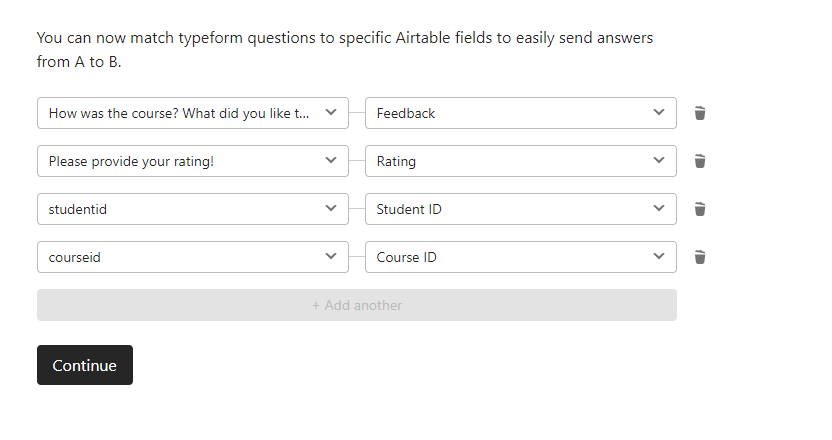
Once you Grant access, it will ask for the table to map to. Once we choose our Feedback table, we should map Typeform questions to Airtable columns. Below is how I mapped 👇
That's it, Just click on Activate Integration and we are good to go!
Hooray, Responses in Glide app
Alright, we did quite some steps 😁. Let's now bring back those responses to Glide. How do we do that?
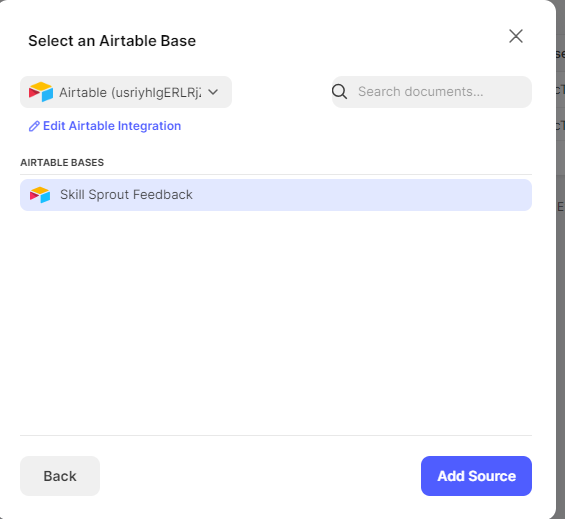
Simple, just create a new table in Glide and map this newly created Airtable's Feedback table as the data source.
You should see the Feedback table being displayed here. Since we integrated both Glide and Airtable they will sync automatically.
There may be a slight delay in refreshing data on Glide, but that's negligible to be honest!
As far as the integration goes, these are the steps. We have one final step to complete. If you remember, we put on hold on adding the action for Mark Complete button. Let's now complete that step so that we are done with the flow and we can see it working.
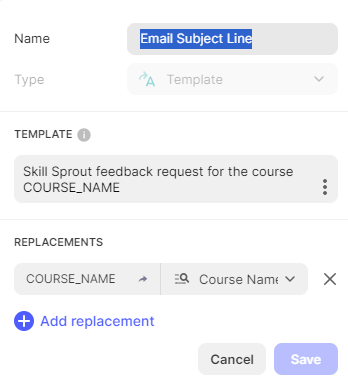
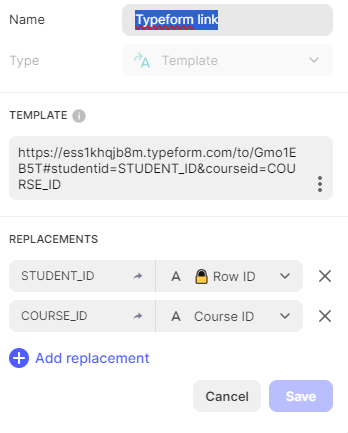
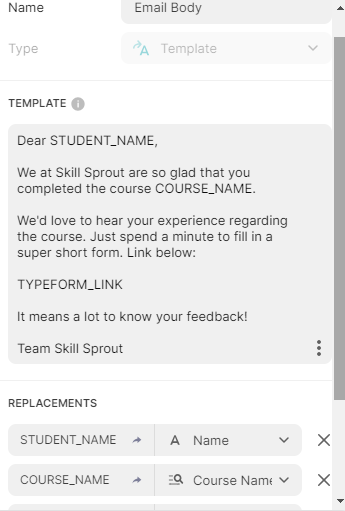
We need to add a couple of columns to the Student table so that we have dynamic content to be sent as part of an email. Below is how I constructed the columns Email Subject Line, Email Body and the Typeform Link (that will be embedded as part of the Email Body)
Wohoo, we are almost there, just define the Glide action and we should see the horizon 🌞
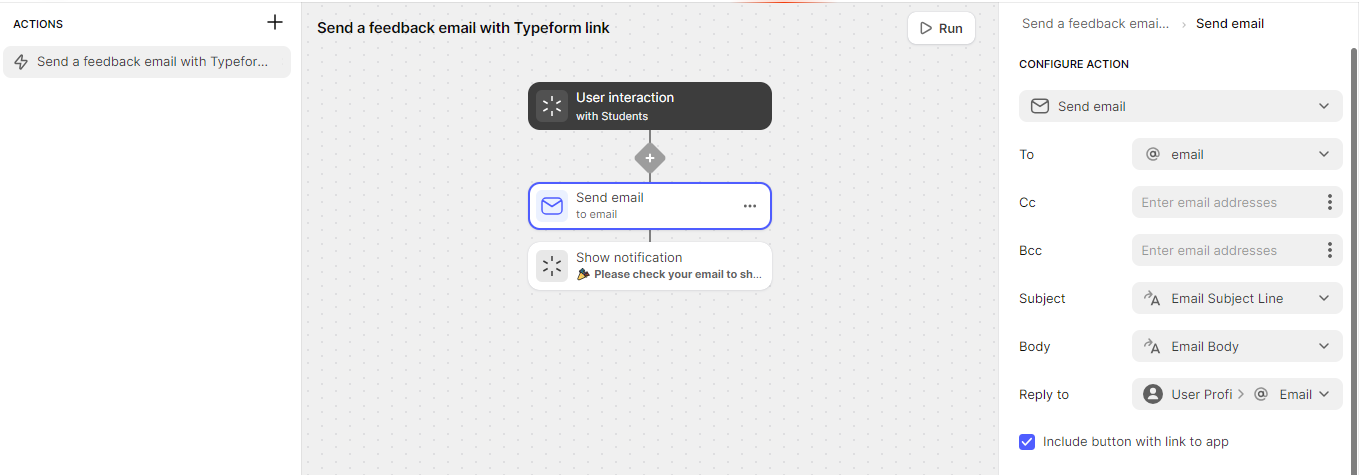
Nothing complex, add a new Glide action corresponding to Mark Complete button. I added 2 steps where the first one sends an email from Glide and the second is just a success message! We map the Student's email as the recipient, the newly added template columns for Subject line and Email Body. Simple!
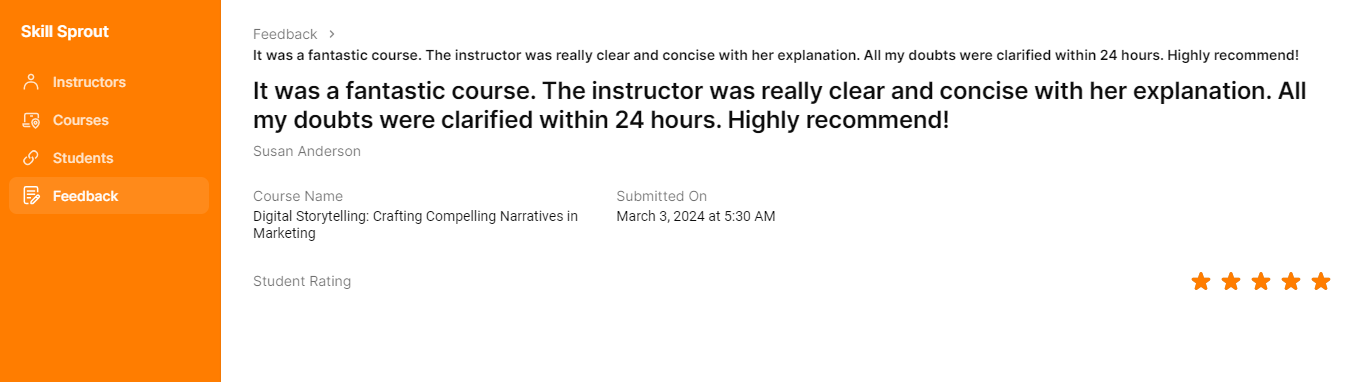
In order to complete the loop, let's add a new menu item Feedback to our Glide app and link it to the Feedback table that we just created. Add a couple of relation and lookup columns in the Feedback table so that we show useful information.
Just to showcase, I clicked on Mark Complete for the student Susan Anderson. I got an email with the Typeform link. I filled in the form and submitted, Boom, the feedback I gave is seen in the Glide app like so 👇
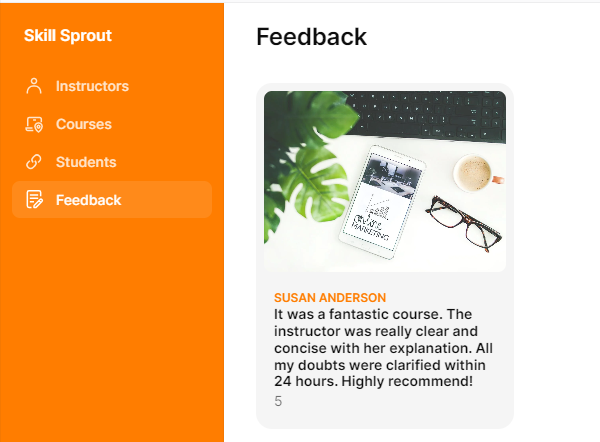
Clicking on the feedback will show some more detailed information
Isn't it super cool?
Conclusion
It may seem like a lot of steps, but it's just a handful
Create a Glide app
Make sure there is a trigger to send the Typeform Link. The Mark Complete button is just an example, you can get creative and keep it anywhere you want !
Design the Typeform
Create a table in Airtable that corresponds to the questions in your Typeform
Integrate both
Add a table in your Glide app whose data source is the Airtable's newly added table
To be honest, that's it. Since I show screenshots of each step, it looks like a lot!
There are so many use cases where you may want to trigger a form or embed a form in your Glide app and take action based on user responses. And this is one straight forward way to do it!
Happy Gliding!
P.S.: If you happen to try integrating Typeform and Glide, please don't forget to share your experience!
If you're new to Glide and need any help, I'm just a call away!