How to build an Image carousel in Glide?
Keeping things simple seems to be inherent in Glide

Introduction
In the past I wrote a couple of posts on Glide, a powerful No Code tool. How to perform multiple actions on form submit,how to integrate with a location platform like Radar to name a few. I thought of keeping it light and simple this time. So, let's just build some fun stuff ⛱
Image Carousel can be an interesting and an essential feature in many web apps. A photo app, a real estate app, and of course needless to say, e-commerce apps.
Building such a carousel is super simple in Glide, shall we see how?
What are we building now?
My strong belief is that we learn a concept best by trying it out, by building something where in we apply a concept, rather than mindlessly watching and reading tutorials. So to keep things fun, let's build a super simple "Favorites" app. It's just a place to capture a couple of your favorite things, things in the form of pictures.
Let's build
Since it's quite straight forward I shall list down the steps required:
Sign in to your Glide account
Click on New app
Give it a name "My Favorites" and choose Large screen
On next, choose Glide tables and click on Create app
It takes you to the app building area (Data, Layout and Actions tab)
By default, there are 3 tables Contacts, Companies and Users. I just retain Users and delete the other two
Create a new table Favorites and add the following columns:
Name : Choose Basic - text
Favorite 1: Choose Basic - image
Favorite 2: Choose Basic - image
Favorite 3: Choose Basic - image
Favorite 4: Choose Basic - image
Favorite 5: Choose Basic - image
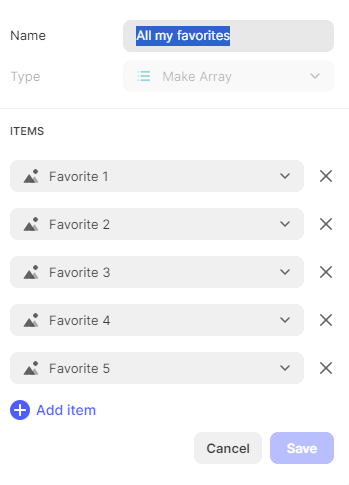
Now for the carousel part 🎠, Add a column and name it "All my favorites": Choose Computed - Make Array and add all the above added Favorite columns. This is how it looks 👇
We are done with the data section. Let's move on to the Layout section.
On the Navigation panel which is on the top left, click on + to add a new menu item
Choose Screen from data and select the newly created Favorites table
By default, a Collection is added under Components panel
I added a row in the data panel manually so that I'll be able to visualize
Let's now beautify it by adding few headings and some relevant text
On right side, you should see 3 tabs General, Options and Actions
Under General tab, there are place holders for Items Data. I mapped the column Name against Name label. Against Description, I gave a text "Click to see my top 5 favorites!"
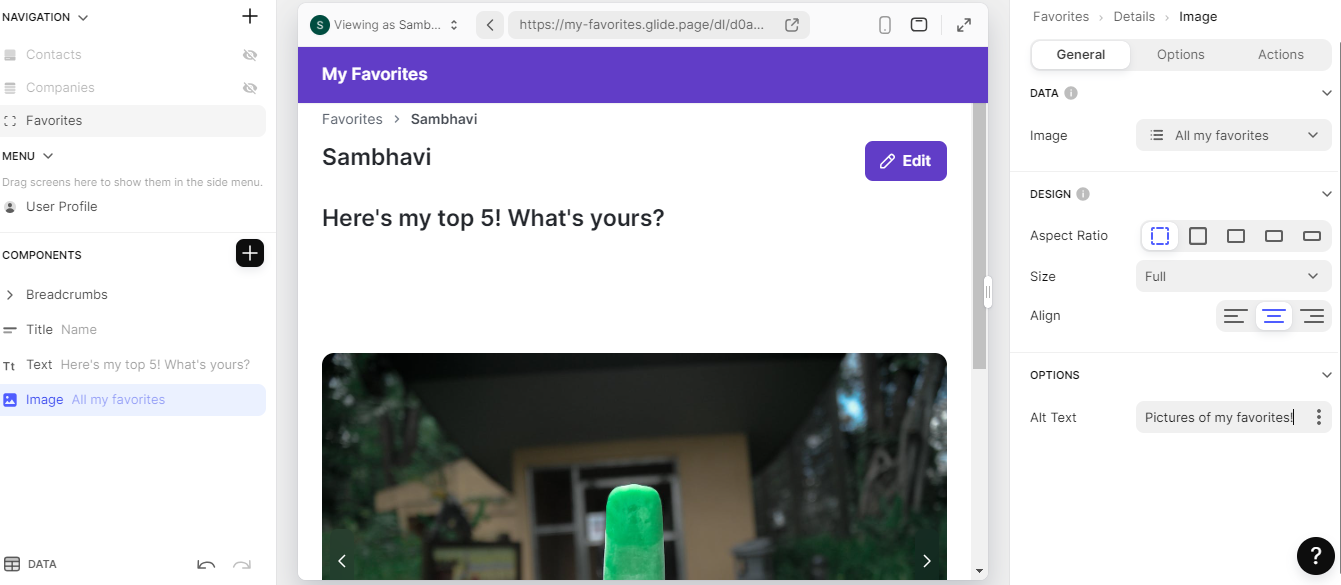
Clicking on the card takes to the detail page. I just added an Image item under Content and mapped it to "All my favorites"
Voila! The carousel is there already, how simple can that be!
This is how the details screen looks like 👇
Make sure you add placeholders in the Edit screen corresponding to all fields in our Favorites table.
Likewise with the Add screen. I just renamed the button label to Add my favorites
Go ahead and publish the app, which is what I did and here is the link. Have fun adding your favorites too!
Conclusion
No Code tools in general aid in quick development of applications, especially if they are quite straight forward. Glide is one such No Code tool. In my opinion the beauty of Glide lies in it's simplicity. Small features like what we saw in this post saves so much time when we actually build a real world app. Glide has many such features that are so easy to implement but adds a lot of value to business.
We'll look at one such simple to implement but super powerful feature in a future post.
Stay tuned!
Don't forget to add your favorites 😁 here !