Capture Typeform responses using Glide API
How to import Typeform responses into your Glide App using the Glide API?

A quick recap
In my previous post we looked at length on creating the most basic version of a Udemy type Glide app. We then created a feedback form using Typeform. As a next step, we invoked an email on a user action in the Glide app that had the Typeform link. Once the user submits the form, we used Airtable (integrated with Typeform) to capture the responses. As a final step, we created a table in Glide that used the Airtable's table as the data source, that way the sync happened automatically. This is one way to bring back the responses.
In today's post, we shall explore another method to perform the same. One primary reason why I wanted to look out for another option is because of the lag it took for the responses to show up in Glide. The secondary reason was to avoid another tool in the ecosystem.
The route I took this time was to make use of Glide API to add a row in the Feedback table which was stitched together through a Zap.
Introducing Glide APIs
The introduction of APIs in Glide has been a game changer as that's the route in order to add/edit/delete data in Glide tables from outside the Glide app.
Let's look at few quick key pointers when it comes to Glide APIs.
Basic APIs are available in Team and above plans only
It allows 3 types of action:
Add a row
Edit a row (or) Set columns in a row
Delete a row
With Business plan and above, Fetch rows is also possible. Just that conditions cannot be added with Glide tables
In order to perform SQL type queries, Big Tables should be used as the database
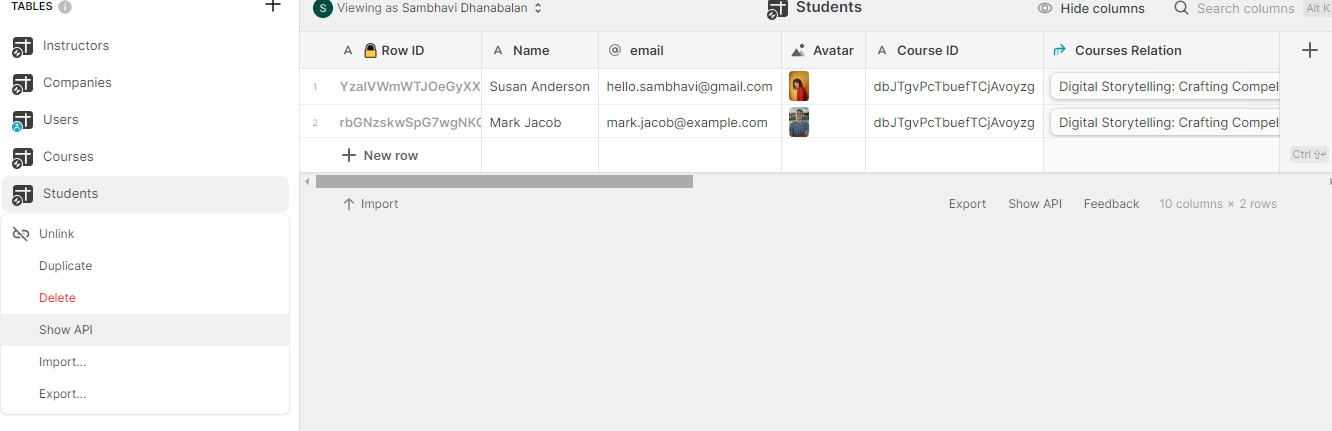
In order to get started, let's get familiar with how the APIs look like and how to access them. For the sake of explaining, let me show the API for one of the table we created in our SkillSprout app.
Go to the Data editor and right click on a table. You should see a menu Show API
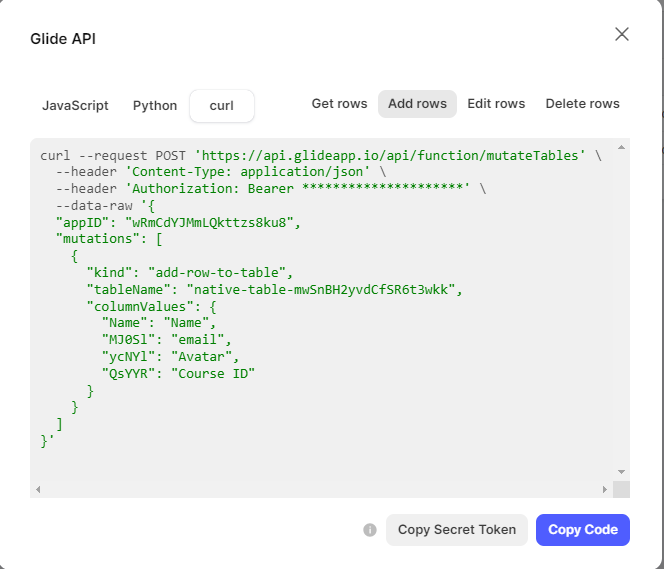
There are 3 options that Glide provides, one using Javascript, the second using Python and the third using curl for each of Add row, Set columns in a row, Delete row and Get rows.
Depending on where one uses the APIs and the tech they are comfortable with, that particular option can be chosen. Likewise, depending on the action we decide to perform we choose that particular piece of code.
That's all as far as setting up of APIs are concerned.
Let's bring in Zapier
Now that we have a decent idea about Glide APIs and how to access/use them, let's now move on to the next component Zapier.
Zapier is an automation tool that connects multiple tools together. In any business, tools like GMail, Google Sheets, Hubspot, Mailchimp, Calendly, Slack and similar ones are extremely common.
In order for these tools to talk to one another, we need a binding component which is handled by Zapier. You name a tool and it be connected using a Zap. Zap is Zapier's term of a workflow. There has to be a trigger that can be followed by any number of steps/actions connecting any tool to any other tool, as long as it supported by Zapier.
Let's look at our use case now and see where Zapier kicks in:
A student clicks on the Typeform link that is embedded in an email
The student fills in the form and submits it
The zap that we create will kick in the moment a new Typeform entry is created. Thus a new Typeform entry is the trigger
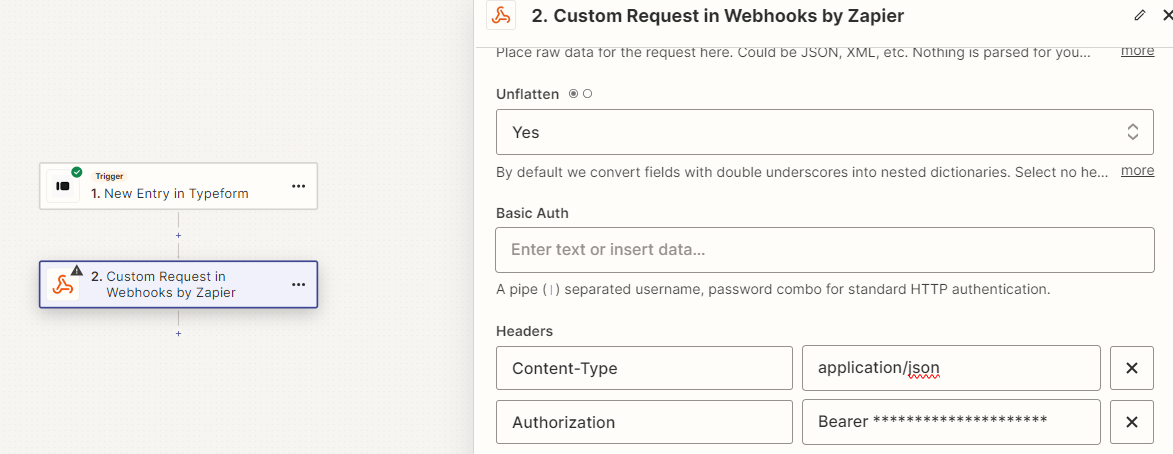
It reads the responses and passes it to the next step which is a Zapier Webhook that takes in a custom request. As part of the request, we add details about the URL that is to be invoked (which is nothing but the Add row API), the data that needs to be passed (which is the Typeform responses) and the header information (Content type and a Authorization token)
That is all. Once these two steps are configured in Zapier, every time a user submits a response, our feedback table is automatically updated. The lag in this case is less than a second most of the time.
Steps to configure
We perform the following steps in order to see the magic happen 🦸♀️
Refer to my earlier post to set up the Glide App and the Typeform form
Instead of the Feedback table that was pointing to Airtable, we create a new table Response with the same structure, but as an usual Glide table
Sign up with Zapier if you do not have an account. Else, Sign in
Create a new Zap and add Typeform as the trigger. Typeform has only one type of action that can be assigned, which is New Entry
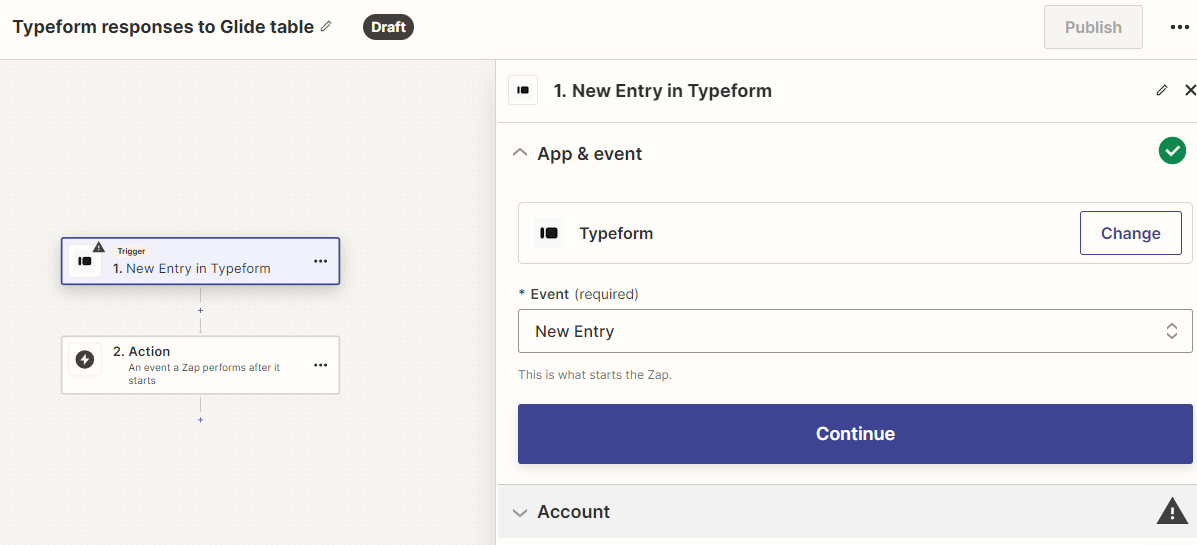
Click on Continue and connect your Typeform account
Once connected, it will list the forms in your account. I chose the Skill Sprout feedback form that I created earlier
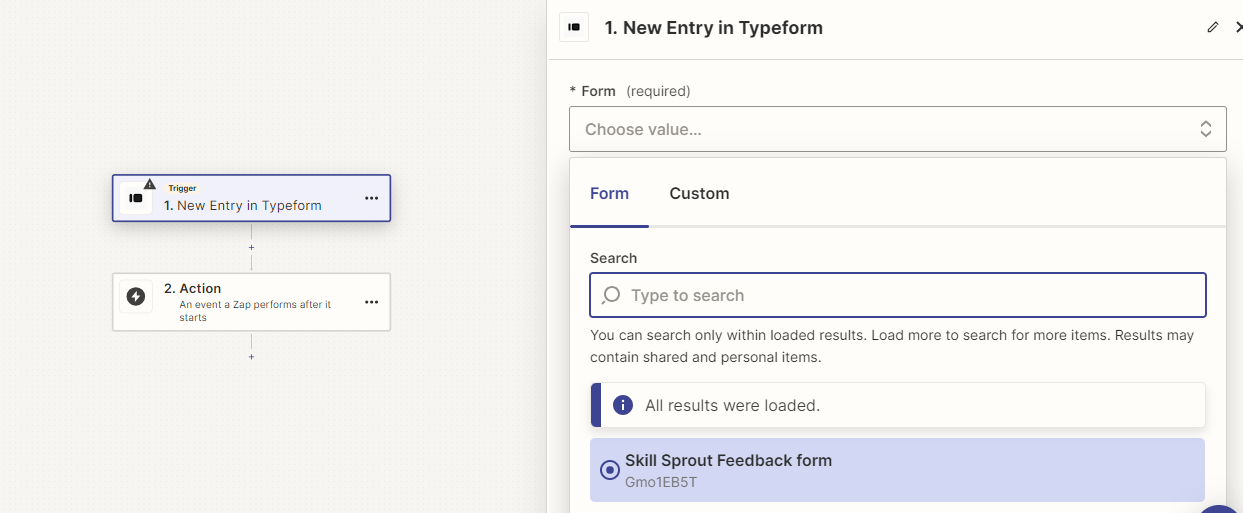
On selecting the form, it will ask to test the trigger by selecting an existing record. If your form has responses, then they will be shown automatically. Else you may want to manually submit a response and come back to Zapier and refresh to select the newly submitted response
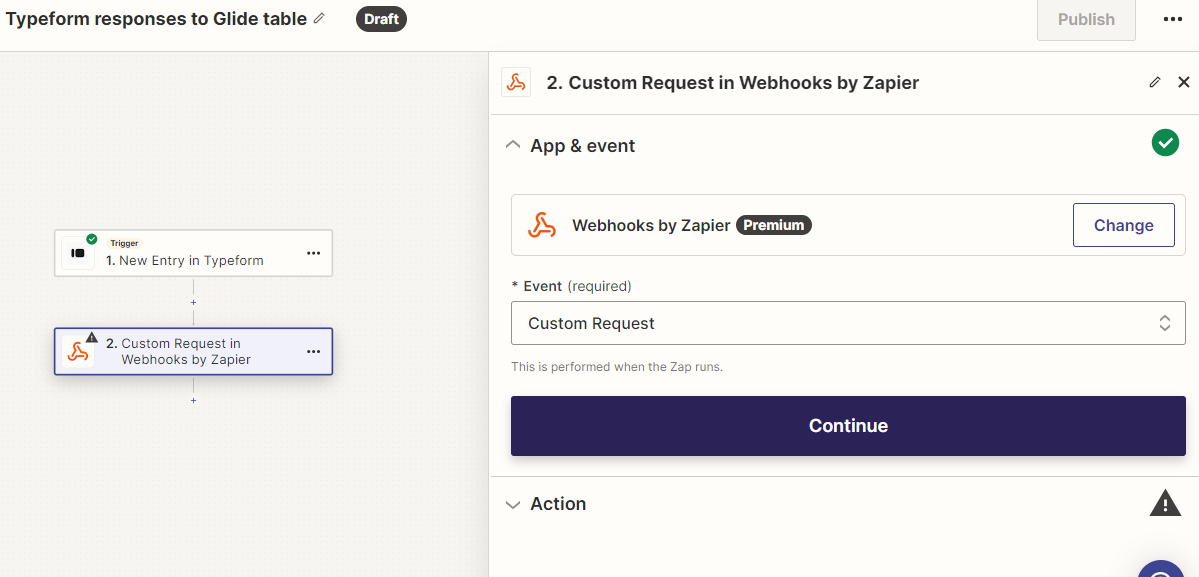
As a next step, select Zapier Webhooks and Custom Request
Before we show the step where we configure the API, let's take a look at the API definition in Glide for the newly created Response table
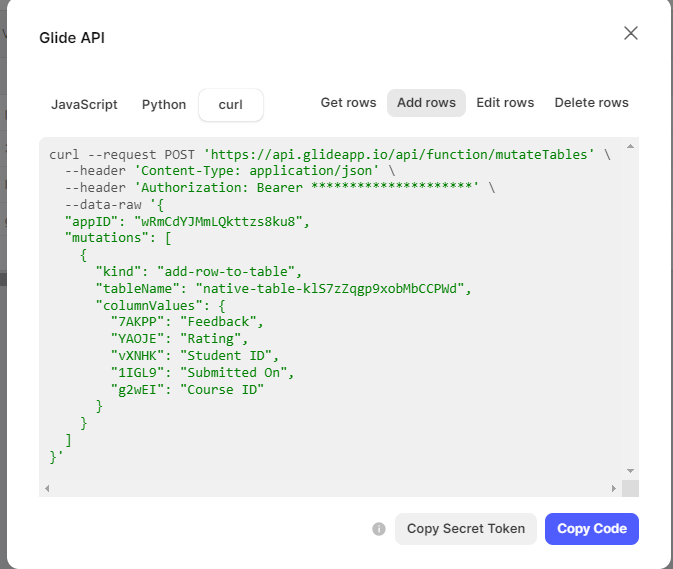 💡Only basic columns are allowed to be manipulated using Glide APIs. Computed columns are not part of the game 😎, logically it does make sense, is it not?
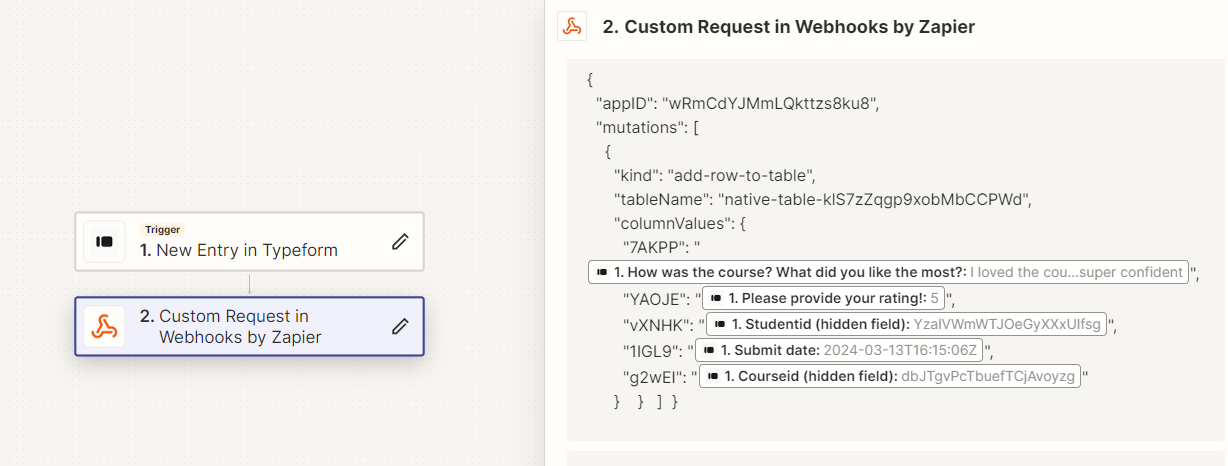
We set Student ID and Course ID as hidden fields in the Typeform so that we know which student submitted the feedback for which course
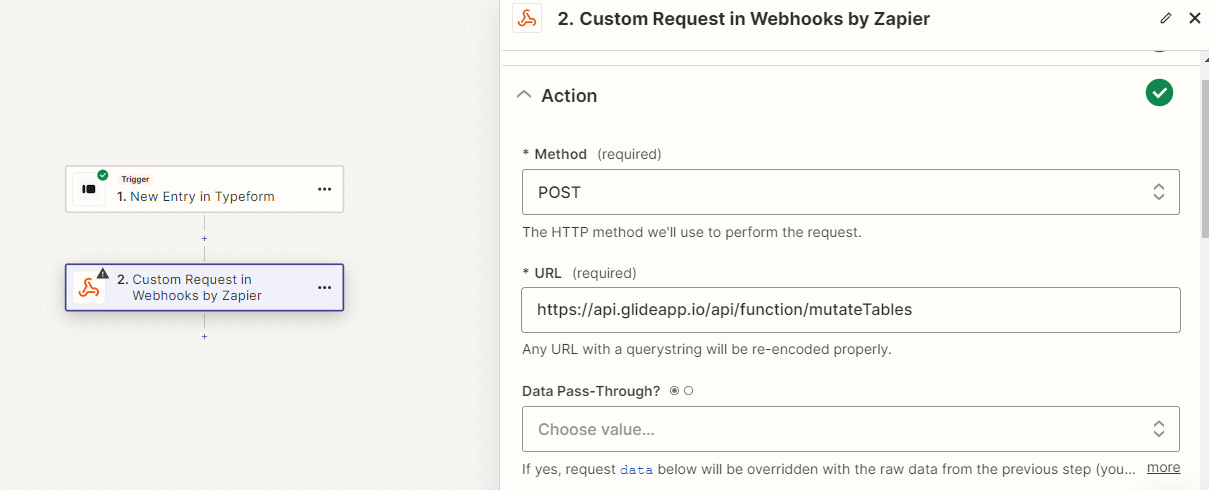
Let's now see the setup in Zap. We set the method as POST, the URL as https://api.glideapp.io/api/function/mutateTables, the data is what appears beside data-raw between the single apostrophes. Under header section, we add the Content-type and assign it the value application/json and Authorization with the value Bearer followed by the secret code.
💡In order to find out the secret code, click on Copy Secret Token
- Time to publish the Zap. In order to do that, just click on Publish on the right corner of the navbar
Time to see it in action
Quickly I did a screen recording showing the work in action. If you happen to watch the recording, you will know how seamless it is, the whole process of a response from another tool coming back to Glide in a snap of a finger.
It's a very simple method but super powerful. From an end user perspective, there'll be no difference at all in the way things are stitched. Isn't that great?
Conclusion
In this post, we saw an alternate method to capture Typeform responses and bring them back to a Glide table using Glide API and Zapier.
I find this method to be a better one in comparison with the earlier approach of integrating with Airtable. Mainly for the immediate refresh that happens on Glide table and thus the usability of the app is more seamless ✨
Make is another automation tool that is similar to Zapier. One can use Make as well to perform the same step of steps instead of Zapier. Probably in a future post I shall write about using Make for this use case 😎
If you have other methods in which you integrate, feel free to share your approach. Let's learn together 🤝