Simple Django Tip #1
Multiple settings file, one for each environment

This is a super short post with a simple tip that can be performed in any Django project. Though simple, it aids in keeping the code clean, and easy to debug and maintain. I cannot emphasize the usefulness of this step.
When I started to learn Django in the past, I used to follow Django's documentation and build my projects. This is how I used to create a project,
django-admin startproject <my_fancy_project>
On becoming a seasoned user, I started to use pydanny's cookiecutter. This had pros and cons, initially, I was blinded by the cons. Irrespective of whether I need all the properties that come with the cookiecutter, I used to have them religiously, install required packages or comment them out.
Since I do this activity only when I start a project, it doesn't seem like a lot of work. Outside of work, when there was a need to create small projects that accompany my blog post or to try a new feature, I started to feel that cookiecutter was overkill. It was meant for production-grade work, not for random pieces of work.
At the same time, the vanilla django project was also insufficient as I'd deploy the project with some cloud provider. Especially, with one settings.py and dumping all properties related to all environments was not the right way of doing things.
I now follow this approach of having multiple settings.py and using the right one depending on the environment where I run the project. I wanted to share the steps in this short post so that you also follow these steps whenever you start a Django project and make it a default 😎
Step 1: Let's start by creating a virtual environment
Navigate to the folder where you intend to create a Django project. Execute the command below that creates a virtual environment 👇
py -m venv <name of your virtual environment>
Step 2: Install Django
pip install Django
Step 3: Create a Django project
django-admin startproject <your-fancy-project-name-here>
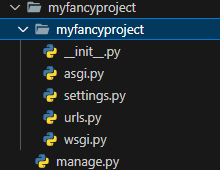
Here is how the folder structure will look like on executing the command
Step 4: Start the development server
On changing the directory to the newly created project, start the development server using the command below 👇
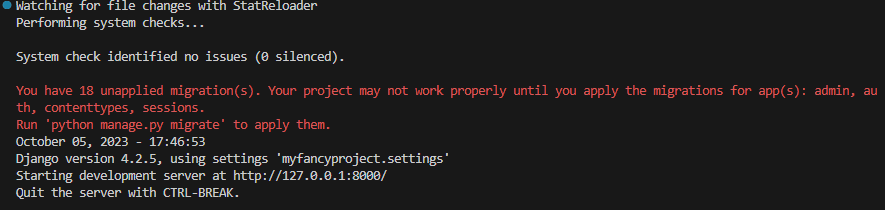
python manage.py runserver
This is what the terminal looks like. If you notice, it makes use of myfancyproject.settings for the properties that it needs.
Step 5: Let's create multiple settings file
Let's stop the server for the moment. Next, create a folder called settings at the project's root level. Move settings.py under settings folder. Rename settings.py to base.py. Create two additional files in the same folder namely local.py and production.py.
As you might have guessed base.py serves as the common file for all environments. local.py will override properties that pertain to a development environment. production.py will maintain properties that will be required in a production environment.
staging.py too, that you can use in your staging environmentStep 6: Extend base.py in the other two files
Open local.py and production.py and add the line of code shown below 👇
from .base import *
This means all properties from base.py are accessible in the other two files. We now need to modify properties that are particular to each environment.
The first property we may change is DEBUG = False in production.py as we may not want to show the end user any sensitive information in case of errors.
Likewise, we may want to have different email IDs in each of the environments. There are so many other properties that vary from environment to environment.
Step 7: Modify manage.py to pick up the right file
Now that we have separate files, we need to instruct manage.py to pick up the right file. With the current setup, the development server will not start as there is no file with the namesettings.py. Below is how manage.py looks like by default 👇
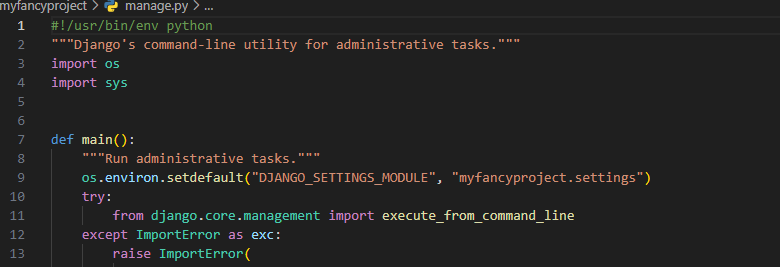
We now need to change the logic in Line No. 9. Here's how we do 👇
def main():
    """Run administrative tasks."""
    if base.DEBUG:
        os.environ.setdefault("DJANGO_SETTINGS_MODULE", "myfancyproject.settings.local")
    else:
        os.environ.setdefault("DJANGO_SETTINGS_MODULE", "myfancyproject.settings.production")
Based on whether the property DEBUG is True or False, we navigate to the appropriate file. This is one common way of branching out but not the only way to do so.
We can have an environment variable that denotes the environment we are currently in, and we can branch out based on that. These are dependent on your project and scenario.
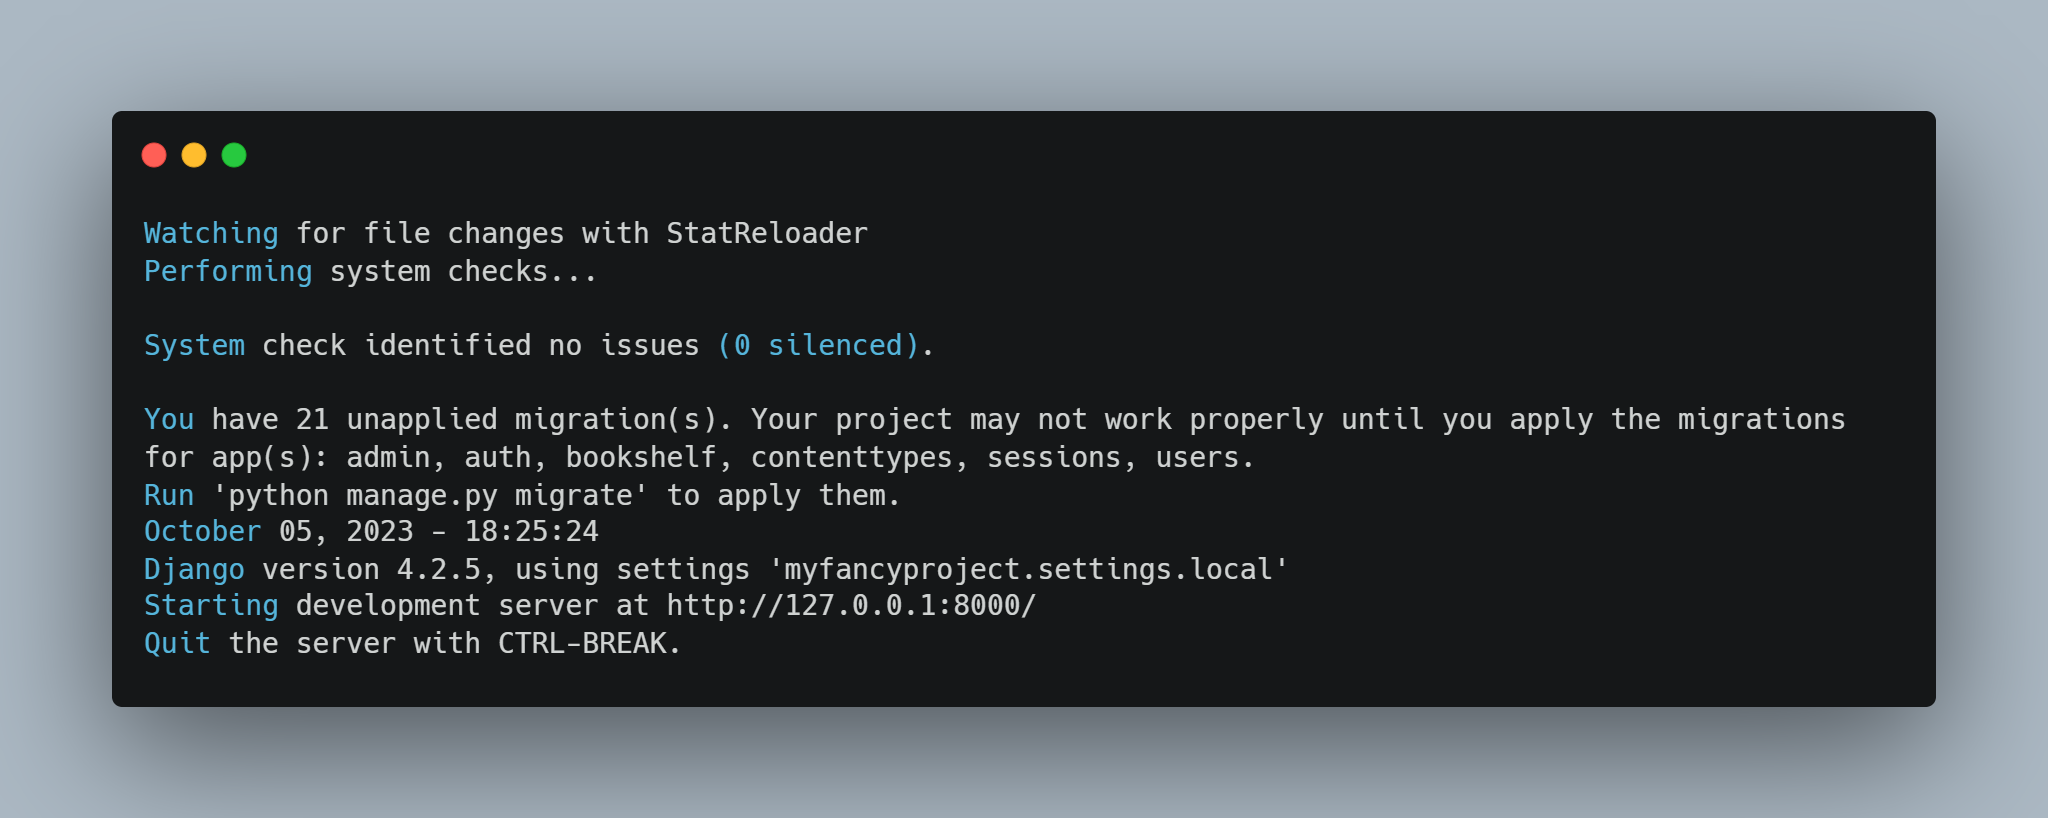
Step 8: Start the development server again
When we start the development server now, we should be able to see that it picks up local.py like so 👇
That is all for now! Quite simple, but it helps to keep the code well organized.