Notes from a course that helped me integrate django and Vue
I did a follow along of what the instructor said with the only change of building an app that I can relate to

Introduction
In one of the projects that I'm working on, there was a need to integrate django and Vue.
There are a lot of articles, blog posts and courses on integrating both. Most of them use the strict frontend and backend approach i.e. Vue takes care of frontend completely, and a API framework like Django Rest Framework will be invoked for the backend.
What I wanted was direct integration between the two. A few articles mentioned in the reference section helped me take this decision. While searching for tutorials and courses I came across a good one on Udemy. The instructor did a neat job of getting to the meat.
In general, I have the habit of taking notes whenever I learn something new. This time was no exception 😉. As it was a video course, it'll need to be watched multiple times. Instead, I captured all notes in this post.
As part of the exercise, I build an extremely simple app "BookReview" which is a one-pager at the moment. The intent was to understand how the integration works, and not on building an app. Hence decided to keep it super simple.
Code along if you are in a similar situation to me 🤩. If you are interested to know more background on what exactly I'm building, and how did I get to this situation, do check out my series, especially this post where I explain in detail.
Alright, let's start to code
Create a folder django-and-vue. This will be our root folder. Change the directory to django-and-vue.
Install a virtual environment and activate it
python -m venv venv
venv\Scripts\activate
Set up a Django project
The first and foremost step is to install django. Once done, create a folder called src under `django=and-vue` , change directory to the same. Then create a django project using the startproject command. Once the project is created successfully, do not forget to run migrate so that the base set of tables is created. Below is the set of commands that performs the same 👇
pip install Django

mkdir src
cd src
django-admin startproject mybookreview .
python manage.py migrate
Create a Vue JS project
Change the directory to the root folder django-and-vue and then issue the following
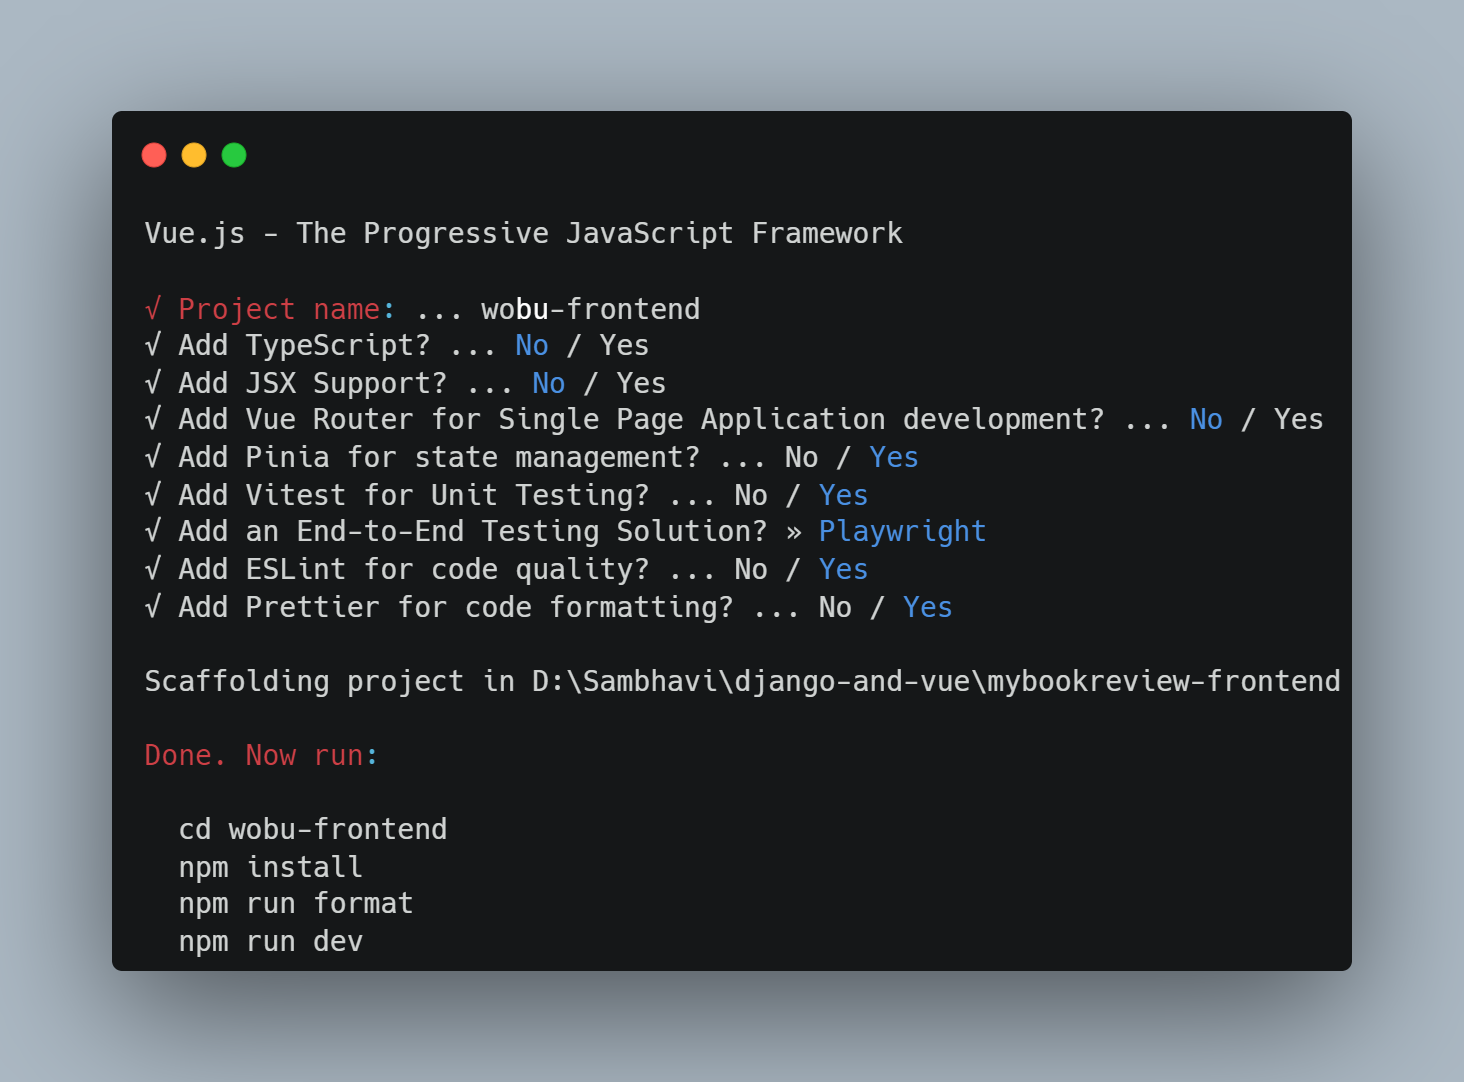
npm init vue@latest
These are the values that I chose 👇, I kept them to a minimum as my intention here is to integrate the two, and not build a full-fledged Vue application
Re-name the folder src under mybookreview-frontend to frontend
In vite.config.js, modify src under defineConfig to frontend
export default defineConfig({
  plugins: [
    vue(),
  ],
  resolve: {
    alias: {
      '@': fileURLToPath(new URL('./frontend', import.meta.url))
    }
  }
})
Let's bring everything under the root folder
Move the following from the folder mybookreview-frontend to the folder django-and-vue
frontendpublicindex.htmlpackage.jsonplaywright.config.jsvite.config.jsvitest.config.jsThen delete the folder
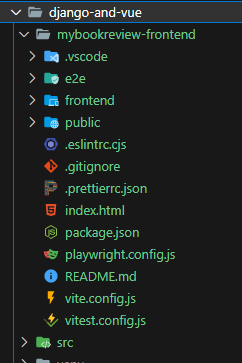
mybookreview-frontendas we do not need it anymore. This is how the folder structure looks like finally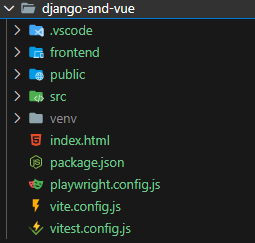
Now execute npm install from the root folder django-and-vue. This installs all the development dependencies as mentioned in package.json
Time to build
We use Vite as our build command. Here is the definition from Vite docs
Vite is a build tool that aims to provide a faster and leaner development experience for modern web projects. It consists of two major parts:
A dev server that provides rich feature enhancements over native ES modules, for example extremely fast Hot Module Replacement (HMR).
A build command that bundles your code with Rollup, pre-configured to output highly optimized static assets for production.
In our package.json, we add a few parameters to dev and build under scripts. This is what it looks like after adding them 👇
  "scripts": {
    "dev": "vite build --mode development --base /static/vue-dev --outDir ./src/static/vue-dev/ -w",
    "build": "vite build --mode production --base /static/vue-prod --outDir ./src/static/vue-prod/",
    "preview": "vite preview",
    "test:unit": "vitest",
    "test:e2e": "playwright test",
    "lint": "eslint . --ext .vue,.js,.jsx,.cjs,.mjs --fix --ignore-path .gitignore",
    "format": "prettier --write src/"
  },
We now execute yarn dev or npm run dev. You will notice vue-dev and vue-prod folders being created under static
Those in turn have assets folder with default image files.
Configuring static files in django
First, set the value of STATICFILES_DIR. This path tells where the static files are located, which is nothing but the static folder that resides at the same level as manage.py.
We then set the value of STATIC_ROOT. This path tells where the files need to be served from. Since currently we are in a development environment, we just keep a separate folder (local-cdn\static) for it, whereas in an actual production environment, it will be one of django-storages.
We do the same for MEDIA_URL and MEDIA_ROOT. These two parameters are where user-uploaded images, videos, and files are stored.
On setting these parameters, this is how it looks like 👇
STATIC_URL = "static/"
STATICFILES_DIRS = [
    BASE_DIR / "static",
]
STATIC_ROOT = BASE_DIR.parent / "local-cdn" / "static"

MEDIA_URL = "media/"
MEDIA_ROOT = BASE_DIR.parent / "local-cdn" / "media"
local-cdn to .gitignore as we don't need to check in the folder to gitServing static files in django development environment
We need to add values related to STATIC_ROOT and MEDIA_ROOT in urls.py for the files to be served while the development server runs.
This is what it looks like 👇.
from django.conf import settings
from django.contrib import admin
from django.urls import path

from . import views

urlpatterns = [
    path('', views.home_view, name="home"),
    path("admin/", admin.site.urls),
]

if settings.DEBUG:
    from django.conf.urls.static import static
    urlpatterns += static(settings.STATIC_URL, document_root=settings.STATIC_ROOT)
    urlpatterns += static(settings.MEDIA_URL, document_root=settings.MEDIA_ROOT)
Set up templates
Create a folder templates at the same level as static or manage.py. Then navigate to settings.py and add the folder path against DIRS under TEMPLATES
Look at the value of DIRS below 👇
TEMPLATES = [
    {
        "BACKEND": "django.template.backends.django.DjangoTemplates",
        "DIRS": [BASE_DIR / "templates"],
        "APP_DIRS": True,
        "OPTIONS": {
            "context_processors": [
                "django.template.context_processors.debug",
                "django.template.context_processors.request",
                "django.contrib.auth.context_processors.auth",
                "django.contrib.messages.context_processors.messages",
            ],
        },
    },
]
Once the folder is set, let's add files to it. The first would be a base.html where we usually write the common code that will be used in other htmls.
Keeping it simple 👇
<!DOCTYPE html>
<html>
    <head>
        <meta charset="UTF-8">
        <link rel="icon" href="/favicon.ico">
        <meta name="viewport" content="width=device-width, initial-scale=1.0">
        <title>My Book Review</title>
    </head>
    <body>
        {% block content %}

        {% endblock %}
    </body>
</html>
We then add a home.html, again super simple to start with 👇
{% extends "base.html" %}

{% block content %}
    <h1>My Book Review</h1>

{% endblock %}
Let's now check whether all our settings work fine. Start the development server python manage.py runserver and navigate to your browser and enter http://127.0.0.1:8000. You should see the below screen 👇
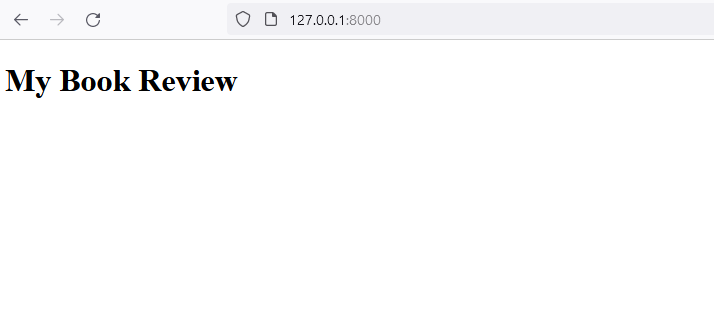
So far so good 🤩
Set the dynamic path to fetch js and css files
Context processors in templates are nothing but functions that add variables to the context of every template rendered. They provide a way to include common data or functionality across multiple templates without explicitly passing the variables in every view.
With this little refresher, let's create a context processor to load our js and css files under assets folder dynamically.
Create a file context_processors.py under the folder mybookreview
Before we write a method to fetch the vue files, let's add a few properties in our settings.py file. First one is STATICFILES_BASE_DIR. We then refer to that in STATICFILES_DIRS
STATIC_URL = "static/"
STATICFILES_BASE_DIR = BASE_DIR / "static"
STATICFILES_DIRS = [
    STATICFILES_BASE_DIR,
]
STATIC_ROOT = BASE_DIR.parent / "local-cdn" / "static"

MEDIA_URL = "media/"
MEDIA_ROOT = BASE_DIR.parent / "local-cdn" / "media"
The second one we add is VUE_PROD and we set it to False
We then write a piece of logic in context_processors.py to iterate and fetch the js and css files and return them as template variables like so 👇
from django.conf import settings

def vue_js_files(request):
    static_base_dir = settings.STATICFILES_BASE_DIR
    vue_name = "vue-prod" if settings.VUE_PROD else "vue-dev"
    vue_dir = static_base_dir / vue_name / "assets"
    js_files = [x.relative_to(static_base_dir) for x in vue_dir.glob("**/*.js")]
    css_files = [ x.relative_to(static_base_dir) for x in vue_dir.glob("**/*.css")]
    return {
        "vue_js_paths" : list(js_files),
        "vue_css_paths" : list(css_files),
    }
"context_processors.vue_js_files" under TEMPLATES - OPTIONS - context_processors in settings.py.Below is what it looks like 👇
TEMPLATES = [
    {
        "BACKEND": "django.template.backends.django.DjangoTemplates",
        "DIRS": [BASE_DIR / 'templates'],
        "APP_DIRS": True,
        "OPTIONS": {
            "context_processors": [
                "django.template.context_processors.debug",
                "django.template.context_processors.request",
                "django.contrib.auth.context_processors.auth",
                "django.contrib.messages.context_processors.messages",
                "mybookreview.context_processors.vue_js_files",
            ],
        },
    },
]
The next step is to reference these variables in base.html so that they are available in every single template that is used. In the <head> section we iterate vue_css_paths template variable and load all the css files. Likewise in <body> section we iterate vue_js_paths and load all js files as <script> tags.
{% load static %}
<!DOCTYPE html>
<html>
    <head>
        <meta charset="UTF-8">
        <link rel="icon" href="/favicon.ico">
        {% for file in vue_css_paths %}
            <link rel="stylesheet" href="{% static file %}"/>
        {% endfor %}
        <meta name="viewport" content="width=device-width, initial-scale=1.0">
        <title>My Book Review</title>
    </head>
    <body>
        {% block content %}

        {% endblock %}
        {% for file in vue_js_paths %}
            <script src="{% static file %}"></script>
        {% endfor %}
    </body>
</html>
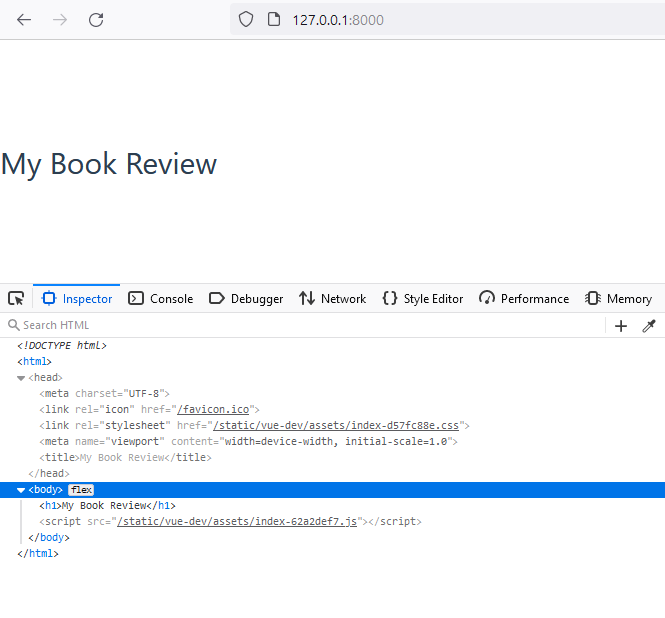
On inspecting the page, we should now see the following 👇
Mount the Vue app in a django template
It's as simple as calling a vue component in a django template with the use of id attribute. How cool is that? 😎
In our frontend folder, there is main.js where the Vue app is mounted using the tag #app.
It corresponds to App.vue that comes by default
We now use this in django's home.html within {% block content %} and {% endblock %}
It looks like this now 👇
{% extends "base.html" %}

{% block content %}
    <div id="app"></div>
{% endblock %}
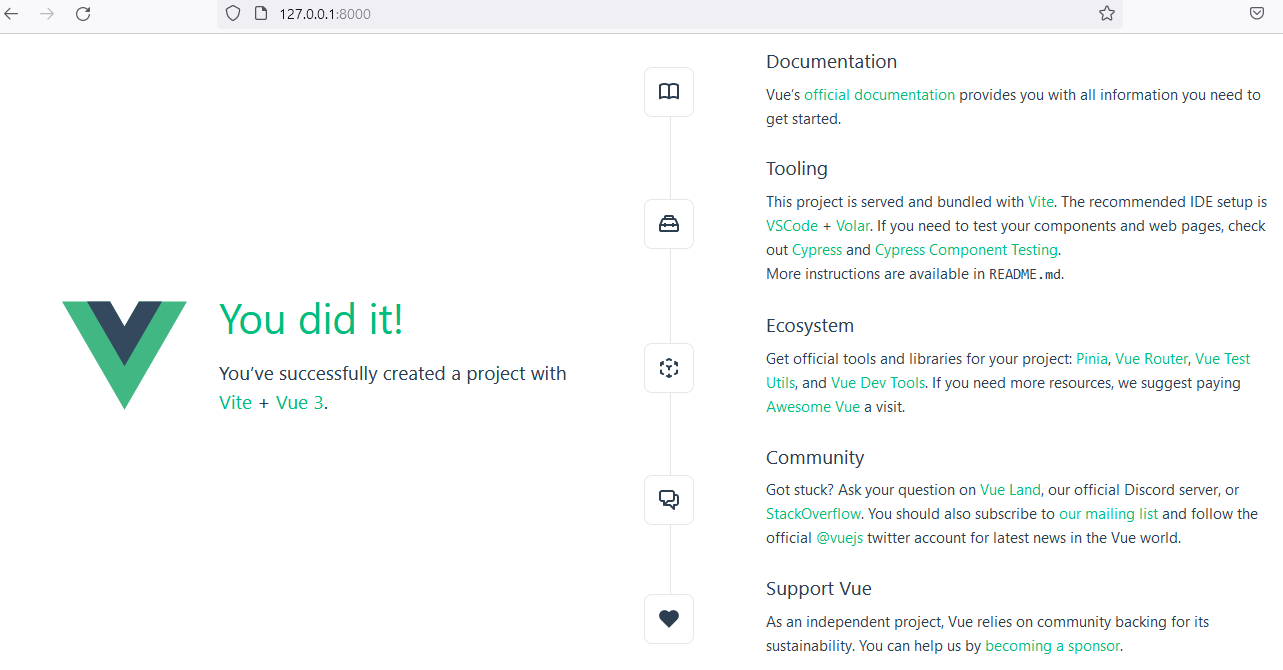
When we refresh the page we see
Now that the first step is done, let's start to pass data back and forth. csrf_token is the most important one that needs to be handled. A quick refresher on csrf tokens below 👇
csrf_token refers to a built-in feature that helps protect against Cross-Site Request Forgery (CSRF) attacks. To mitigate CSRF attacks, Django provides a mechanism that involves including a unique token, known as the CSRF token, in each form rendered on a web page.Let's now pass the token from the django view method to Vue app. To see it working, let's pass the token from home.html
{% extends "base.html" %}

{% block content %}
    <div id="app" data-token="{{ csrf_token }}"></div>
{% endblock %}
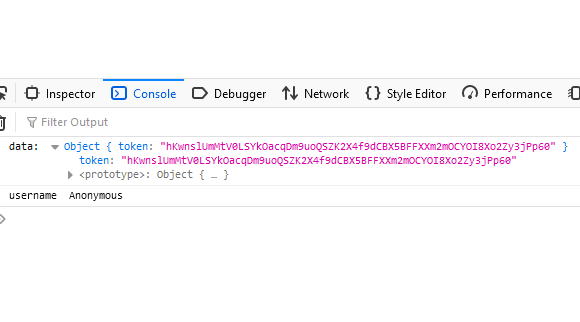
We can easily reference this token in our main.js like so 👇
const el = document.getElementById('app')

if (el) {
    const data = {...el.dataset}
    console.log('data: ', data)
    const app = createApp(App, data)
    app.use(createPinia())
    app.mount('#app')
}
If you inspect your console window on the browser, you will see the token being passed
Alright, the first handshake is done. Let's now create a simple app called bookreviews. The purpose of this app is to add a review for the books you read.
The idea here is not to build a fully blown Good reads, but just to show that with this type of integration, it is possible to do both GET and POST requests.
We shall add a review for a book, and store it in the database. Let's first create the backend part of it.
python manage.py startapp bookreviews
This creates an app called bookreviews under our src folder. Open models.py and add a very simple class like so 👇
from django.db import models

# Create your models here.
class BookReview(models.Model):
    title = models.CharField(max_length=100)
    author = models.CharField(max_length=100)
    review = models.TextField()
Open forms.py and add a ModelForm that corresponds to the BookReview class created in the previous step
from django import forms

from .models import BookReview

class BookReviewForm(forms.ModelForm):
    class Meta:
        model = BookReview
        fields = ['title', 'author', 'review']
As always, let's add this class to admin.py so that we can see the books being added in django-admin
from django.contrib import admin

# Register your models here.
from .models import BookReview

admin.site.register(BookReview)
Time to create the table in the database. Remember that we use the default sqlite that comes as part of django project creation.
python manage.py makemigrations
python manage.py migrate
migrate. Likewise, add bookreviews under INSTALLED_APPS in settings.pyIn our views.py under the django project mybookreview add a function that creates a bookreview in the backend
def api_review_create_view(request):
    if not request.method == "POST":
        return JsonResponse('', status=400)

    data = None
    try:
        data = json.loads(request.body)
    except:
        pass
    form = BookReviewForm(data)
    if form.is_valid():
        obj = form.save(commit=False)
        obj.save()
        data = {
            'id': obj.id,
            'title': obj.title,
            'author': obj.author,
            'review': obj.review,
            'is_created': True
        }
        return JsonResponse(data, status=201)
    errors = json.loads(form.errors.as_json())
    return JsonResponse({"errors" : errors}, status=400)
Likewise, we add a path in urls.py to handle the routing
    path('api/review/create/', views.api_review_create_view, \
            name="api_review_create"),
These steps are the same as we do in a regular django project. Just that we use json to unpack the request data. We also use JsonResponse on success or error.
Now that the backend code is ready, we move on to the frontend. Let's create a new component called CreateForm.vue under components.
<script setup>
    import axios from 'axios'
    import { ref, reactive } from 'vue'
    import store from './../store'

    let title = ref('')
    const initFormData = reactive({
        title: '',
        author: '',
        review: ''
    })
    const formData = reactive({initFormData})
    const error = ref({})

    const handleSubmitForm = async (event) => {
        if (event) {
            event.preventDefault()
        }
        const formDataJson = JSON.stringify(formData)
        const csrfToken = store.token
        const axiosConfig = { headers: {
            "X-CSRFToken": csrfToken,
            }
        }

        let response;
        try {
            response = await axios.post('/api/review/create/', formDataJson, axiosConfig)
        } catch(error) {
            error.value = error.response
            if (error.response === 500) {
                alert("Server failure. Please try again later")
            }
            console.log(error.value)
        }
        console.log(response)
        if (response.status === 201) {
            for (let key of Object.keys(formData)) {
                formData[key] = initFormData[key]
            }
        }
    }

</script>
<template>
    <form @submit.prevent="handleSubmitForm">
        <div>
            <div>
                <input type="text" v-model="formData.title" required name="title" placeholder="Your book title"/>
                <p> {{  formData.title  }}</p>
                <br/>
            </div>
            <div>
                <input type="text" v-model="formData.author" required name="author" placeholder="Author of the book"/>
                <p> {{  formData.author  }}</p>
                <br/>
            </div>
            <div>
                <textarea v-model="formData.review" required name="review" placeholder="Write your review here"></textarea>
                <p> {{  formData.review  }}</p>
            </div>
            <br/>
            <button>Submit Review</button>
        </div>
    </form>
</template>
Key points in the above piece of code are:
axios is used to send httprequests to the django backend
csrftokenis set in the header and passed while invoking the routerequest data is stringifyed using json and sent while invoking the route
handleSubmitForm is invoked on submitting the form.
<form @submit.prevent="handleSubmitForm">handles the same
That is all. Let's now add a book and a corresponding review and submit the form.
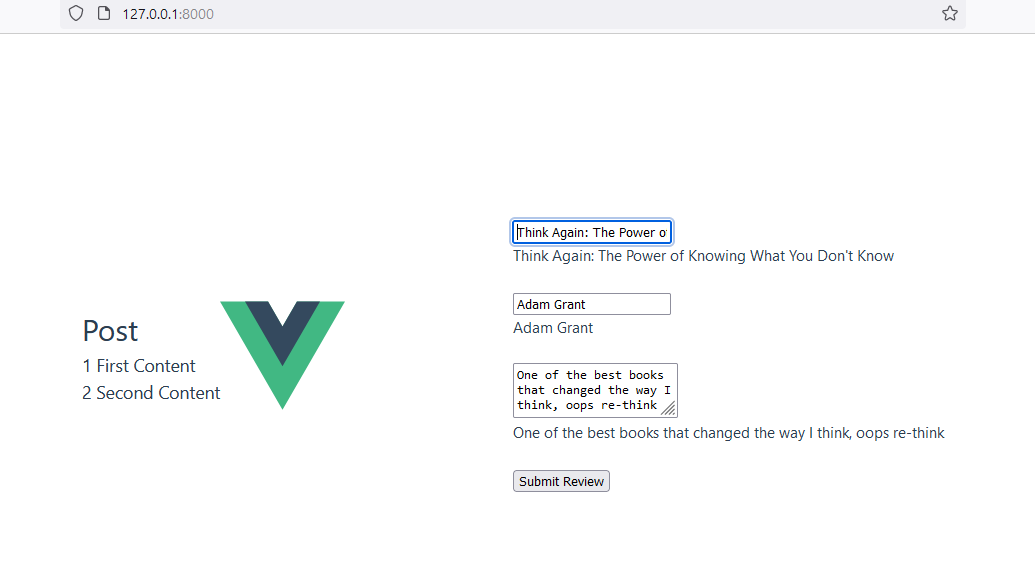
Clicking on submit, validates the form (I did not add any validation at the moment though), and saves the request data.
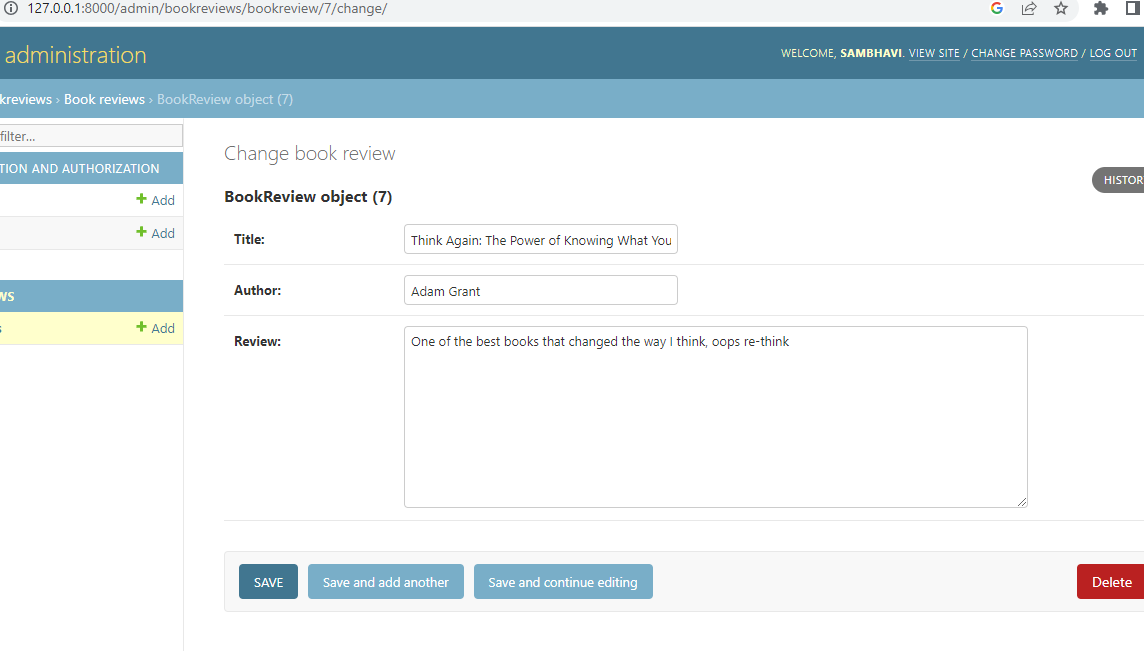
Let's check django admin portal to see whether the created bookreview is stored.
Voila, here it is 😎
That's it. We have successfully seen an end-to-end flow of a Vue frontend with a django backend without using any explicit API frameworks like DjangoRestFramework (DRF)
Conclusion
Depending on my current need, I decided to take this approach of direct integration, thereby harnessing the power of both frontend frameworks (Vue and Django's Template framework). Using DRF may be an elegant solution to handle requests and send responses, and many things will be out of the box too. I still wanted to take this approach and build what I'm building gradually.
Here's the complete code on my github.
References
https://www.udemy.com/course/django-x-vuejs/