


Maintaining a repository in GitHub is quite common in any team these days. One place for your code, issues, PRs and more.
On top of all these, what if there is a means to visualize issues in a trello like tool? Single source of truth for just everything, including project management. How awesome can that be! Yes, all of these are possible if you use GitHub Project.
Whether you are a maintainer of Open source projects, or a developer working in a startup where things are quite fluid, but still need to be planned and tracked, I'm sure GitHub project will come in handy.
I started to use it recently for one of my projects and found it to be very valuable. Personally, it helps me see the progress of my work, in planning my time, aiding me with what I need to focus on at the moment, and also a big-picture perspective.
So, what is this all about?
Even before we deep dive, here are some key terms one needs to know:
Repository - It's where the code that we write resides
Project - A placeholder associated with a
GitHubrepository, that acts as a single source of truthIssue - A logical piece of work that can be tracked, assigned, and merged. It can be developing a frontend screen, or a part of a frontend screen, writing an API, writing test cases, and deploying it in a cloud environment. How we define issues is purely the team's choice, some prefer to open multiple small issues, whereas a few others prefer logically big-sized chunks.
Status - Different states an issue can be in. e.g. Backlog, To Do, In Progress, etc.,
Iteration - Timeline during which the issue is to be worked upon
Milestone - What is the short-term objective with which an issue is associated? One can imagine this to be more of a module in action. For e.g., writing test cases for screen A, backend A, screen B, and backend B will all lead to a milestone of Complete test cases for CI/CD.
Kanban Board View - A type of view that displays issues grouped by status, similar to what we see in a Kanban board
Table View - A type of view that displays issues like a table. The beauty of this view is that we can select by what we want to group on, one can be by Project Milestone, another can be by Iteration, and one more can be based on Assignees.
Roadmap View - This one gives a big picture, in terms of where are we from a timeline perspective, how much is planned for each week, is any particular week overloaded. It's quite easy to move things around as well.
Insights in the form of charts - There is also an option to build charts where we configure what we'd want to see in x axis and y axis. e.g., Having Status on x-axis and count on y-axis as a bar chart gives a good idea when we see it visually.
Quick place to describe what the project is all about - A short description along with a Readme can be added. Very useful for someone new to the repo.
Workflows - This helps in automating status depending on the action performed on an issue. e.g., if an issue is created, it can automatically be assigned Backlog status, or whatever the project maintainer wants.
What do these terms translate to in reality?
Enough talking, let's see them in action. For this post, let me take a repo that I just started with. A bit of deviation here, my son plays competitive badminton. The other day he told me that to practice a few strokes it'd help if someone randomly tells left and right so that he will move accordingly and master the art of moving fast in a random fashion but with control.
I slept on the same thought, and the next day got a spark. Why not develop a simple mobile app that can give him such instructions? To start with, left, right. Slowly I can keep adding more, depending on his requirements.
Since I'm more comfortable developing web apps end to end, I decided to develop the backend APIs using FastAPI and design the mobile app using a low-code tool like Flutterflow.
I have a repo where I add code related to my hash node blogs. Here it is: https://github.com/SambhaviPD/hashnode-blog-code
There is a folder blog #4 - baddy coach which is the one I mentioned above. At the moment there is just one method that says left or right randomly. We shall now see how to start managing this project using GitHub project.
Step 1: Create a Project
Navigate to your repository in GitHub. On the menu items, click on Project. You will be asked to link an existing project or create a new project. Choose the second option. It will show up a screen as below. Provide a name and choose the view (table, roadmap or board)
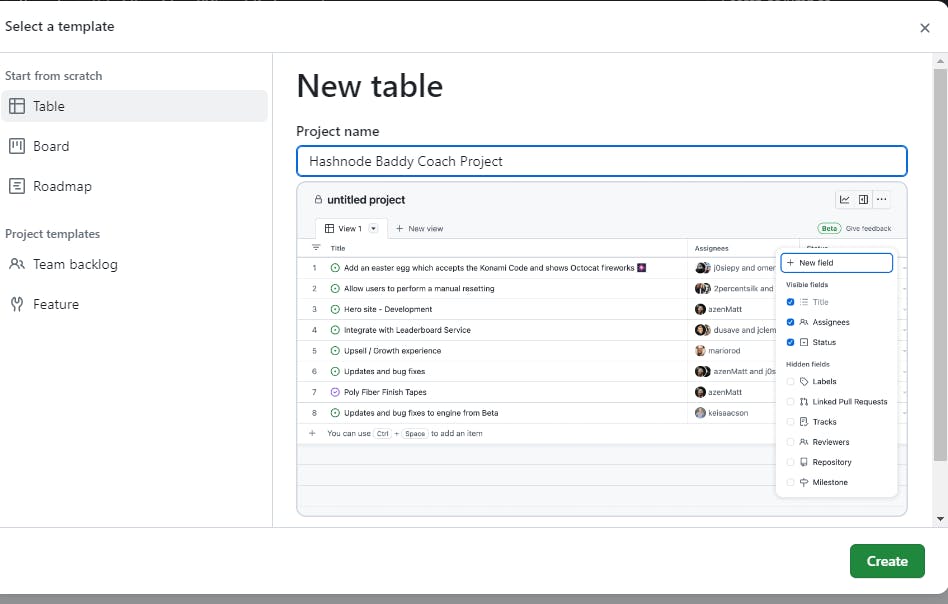
On creating you will see a table view with an option to create an issue or link existing issues. Let's create issues afresh.
Step 2: Create labels and milestones
One can create labels and milestones on the fly when they create issues. I prefer to create them upfront so that we can give them some thought and add proper values.
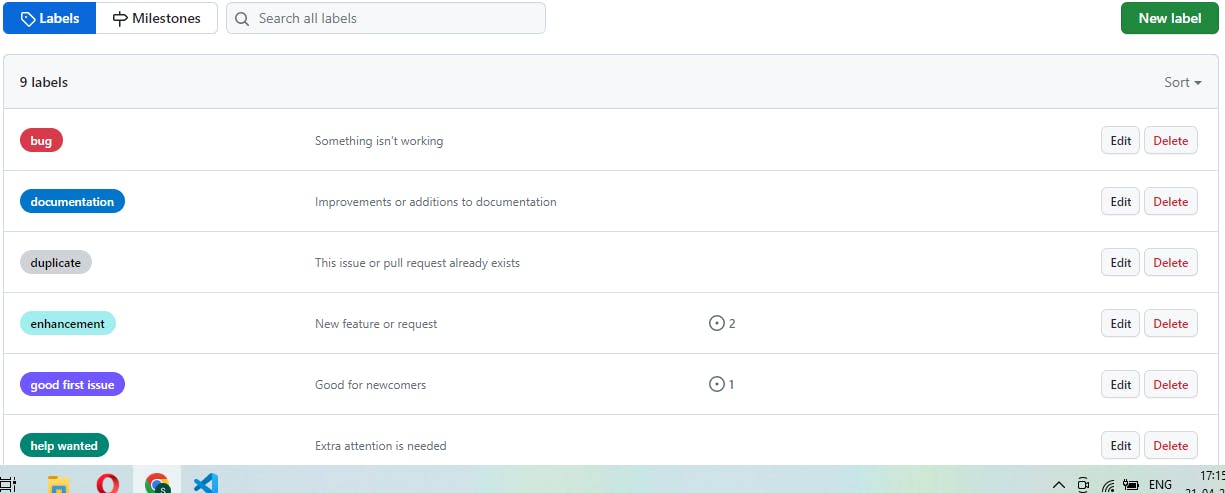
To create new labels and milestones, click on code, then on issues, you see two buttons, labels and milestones. Click on each, and add whatever is appropriate to your project. By default, there are a few standard labels. Below is what it looks like:
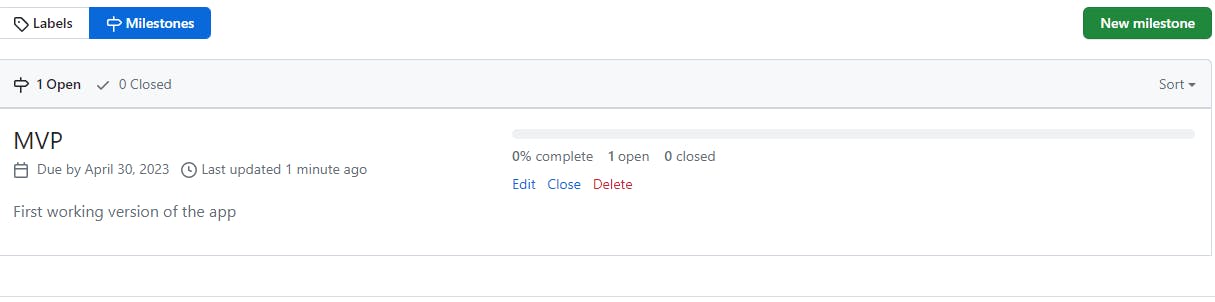
I created a Milestone called MVP and gave it a due date.
Step 3: Create Status, and custom fields tied to a Project
When you click on Edit project, it will take you to the project detail page where you can add Status or any custom field. In general, I add Iteration as a custom field, so that I can map issues against timelines. A quick glimpse of my project detail page:
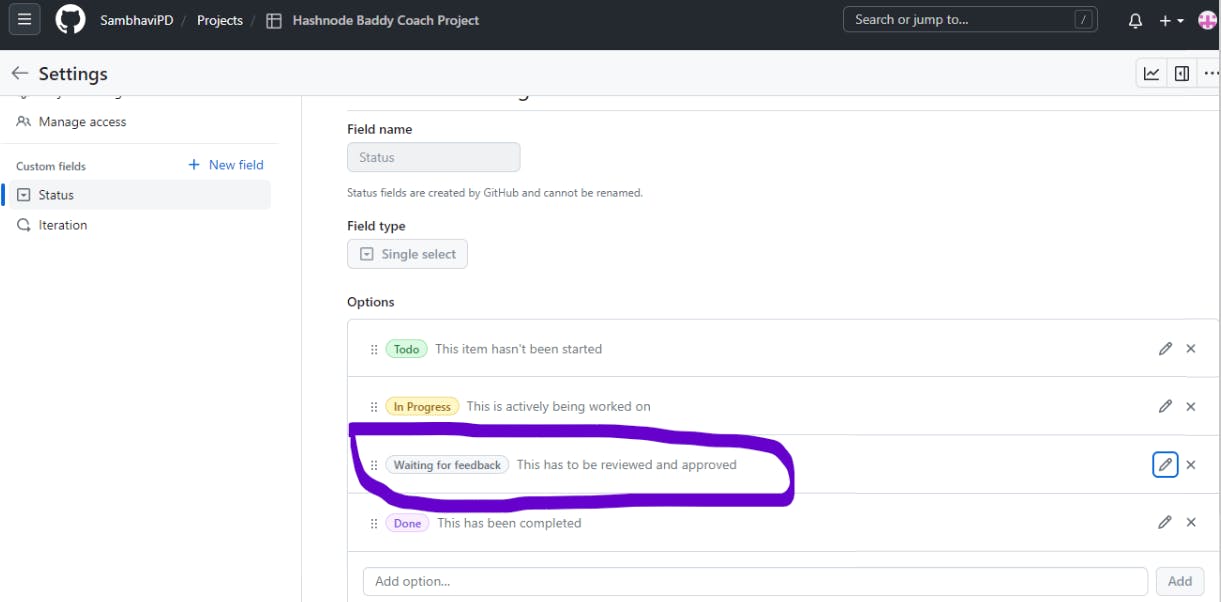
I added "Waiting for feedback" as a new Status. By default, it comes with Todo, In Progress and Done. I also added a new field, selected Iteration as the type, and gave 2 weeks for each iteration. It is up to the project maintainer's interest when it comes to such fields and their values. It is extremely customizable.
Step 4: Create Board View
Go to the project, click on "New View", choose Board, voila, here it is:

You can move issues from one status to another, rather than manually clicking on an issue and changing the status. Likewise, create a Roadmap view. It gives a holistic view of the entire project.
Step 5: Create insights
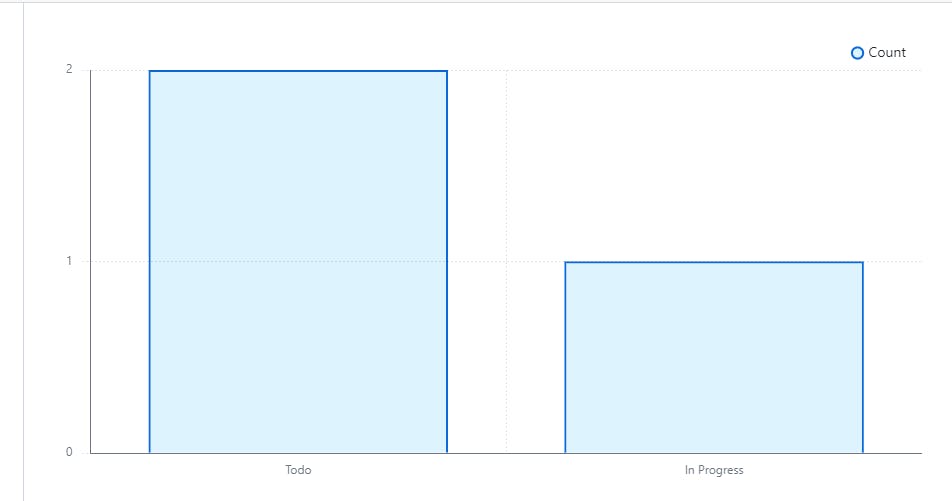
Clicking on insights on the right-side icon will take you to the insights page. There is a default chart with status and count in x and y axis respectively. You can create new charts with other metrics like iteration, milestones, or any other field that will be useful from a project perspective.
A simple bar chart that displays the number of issues in Todo state and In Progress is shown below. Since there are only 3 issues at the moment, it may seem less useful. In a real-world project, when there are a lot of issues, these charts will prove to be a lot useful.
Some closing thoughts...
Although it may take an hour or two to configure a GitHub project, it will be worth it. As and when you add issues with all details, the project view is automatically updated. You can add it to a new repo or an existing one with issues present.
If you would want to learn more about GitHub project in detail, here is the link to their official documentation.
I highly recommend trying this in your next project, especially, if you have a personal project, do take the time to set it up and play around. It will help you stay focused and develop the code much faster.